Appcelerator (DNS) Implementation: Getting Started
Appcelerator is CrowdHandler's DNS-level integration. You point your site's DNS record at a dedicated CrowdHandler endpoint and we proxy traffic to your origin, giving you a white-label waiting room that can't be bypassed by disabling JavaScript.
Setup involves a TLS certificate being issued by a third party, so allow several hours end to end. If you need protection today, run one of our other integrations in the meantime and switch over when the certificate is ready.
Appcelerator is available on CrowdHandler's Standard plan and above.
Step 1: Switch your domain to Appcelerator (DNS)
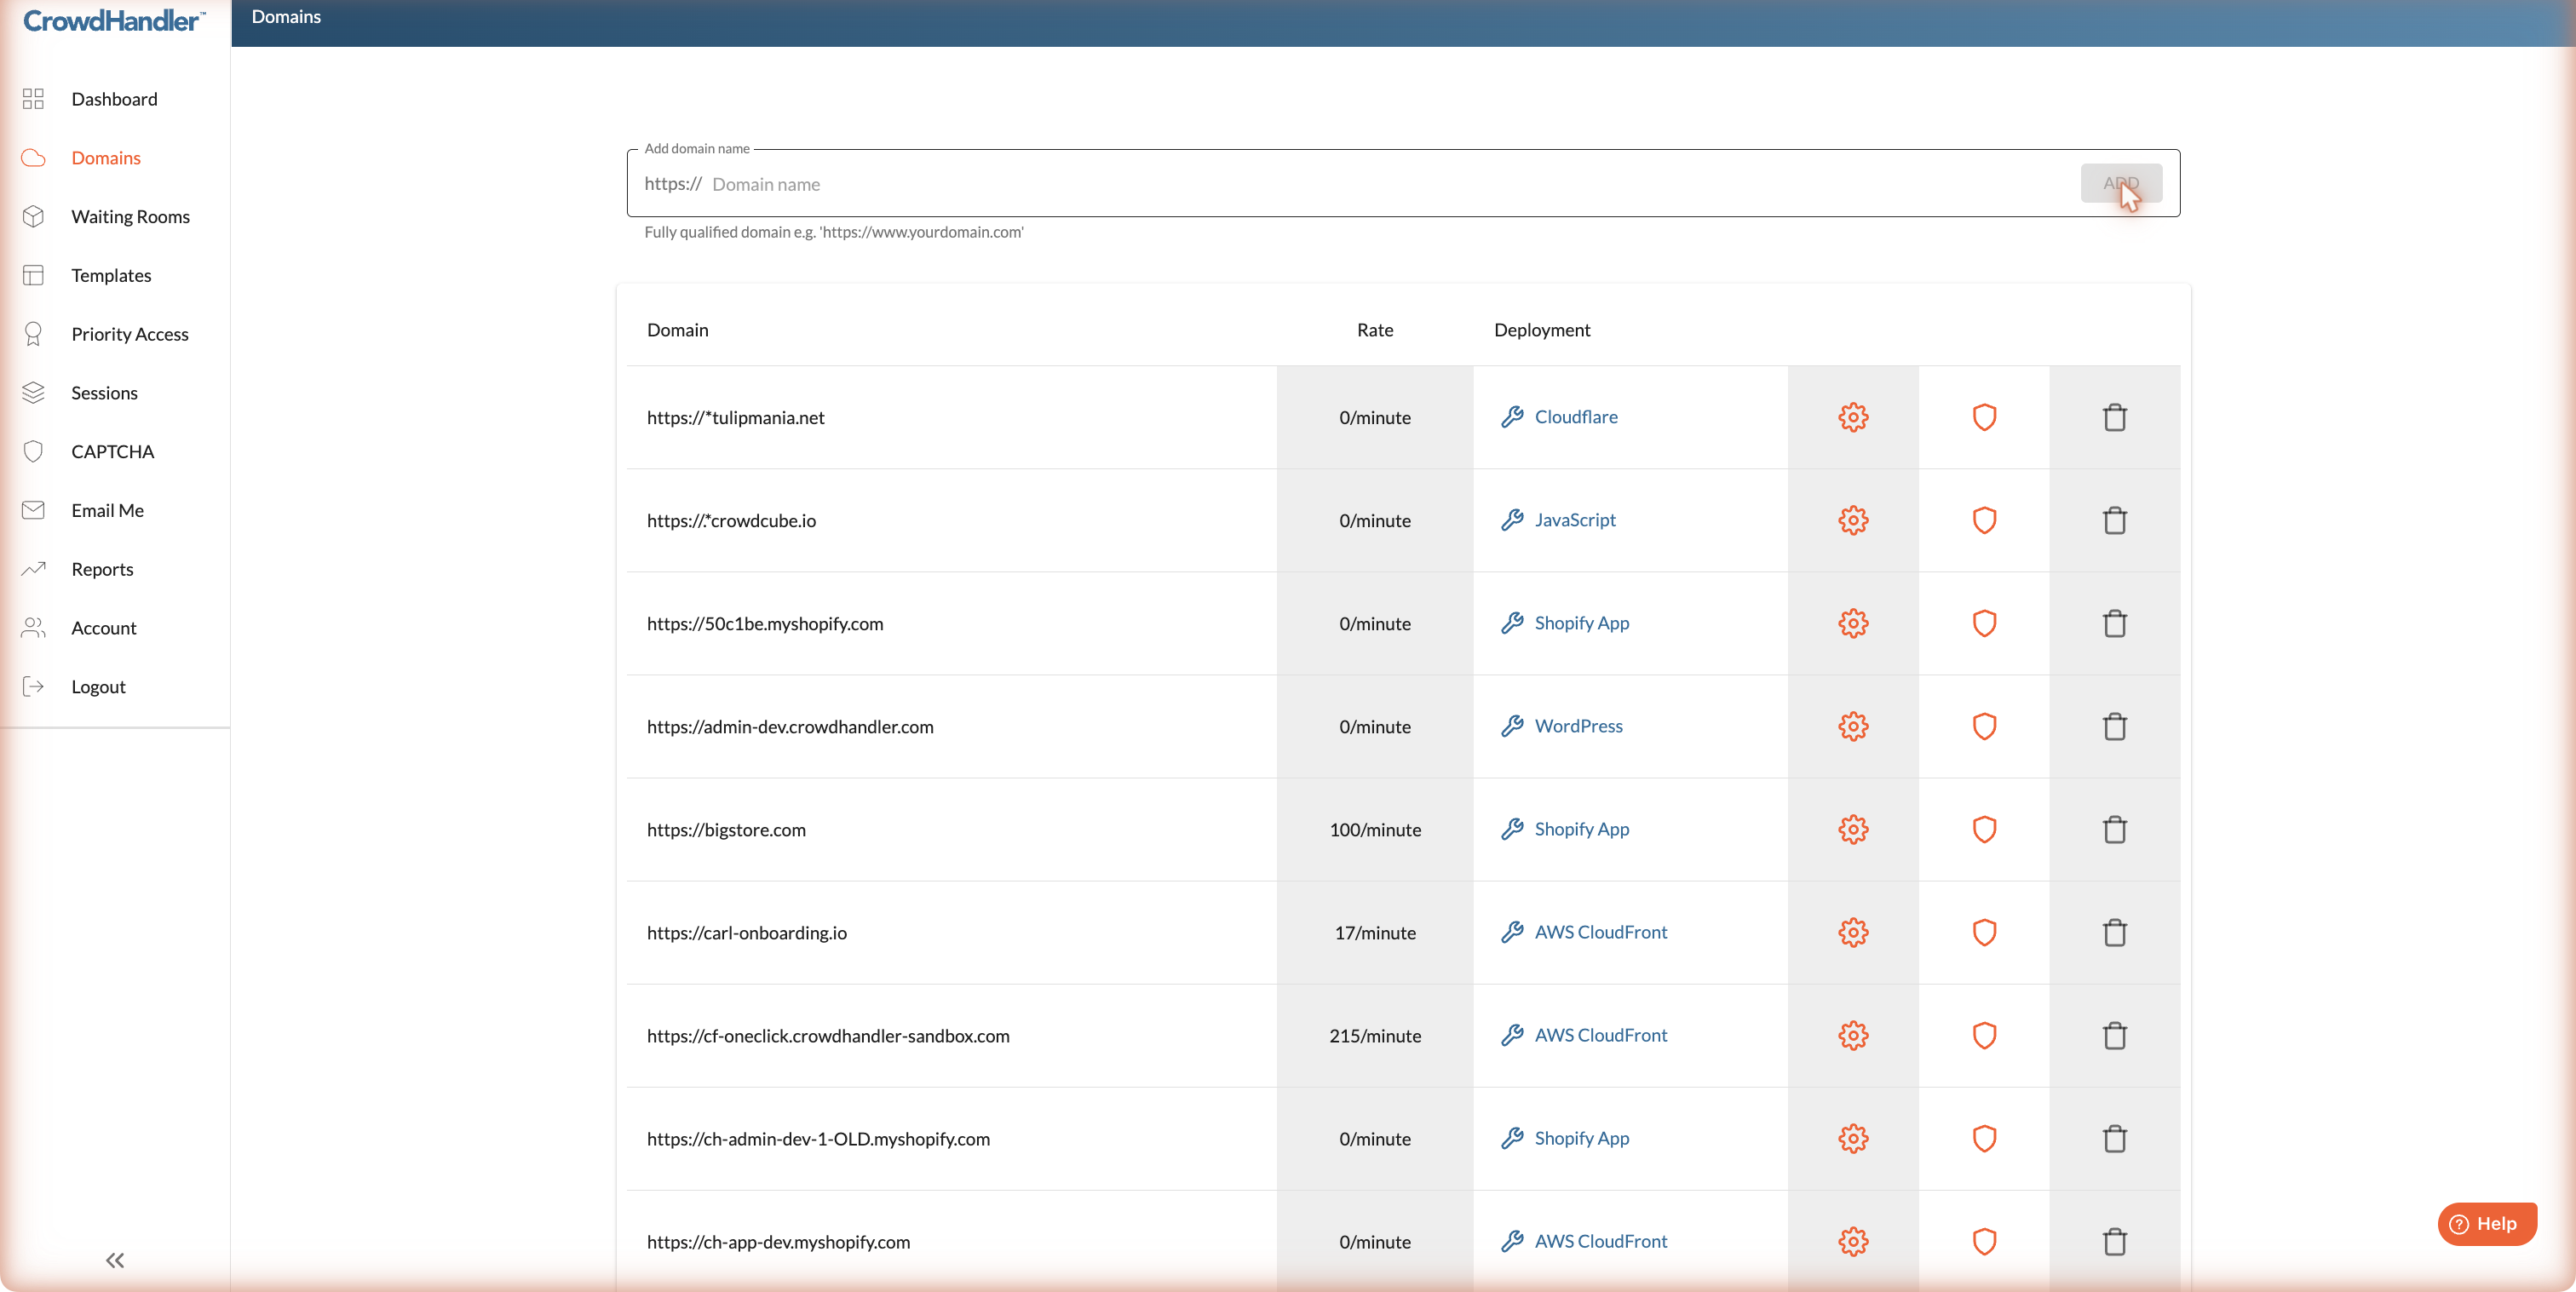
Go to https://admin.crowdhandler.com and open Domains.
To add a new domain, type it into the box at the top of the page and click the + button. To change an existing domain, click its Settings (cog) button.
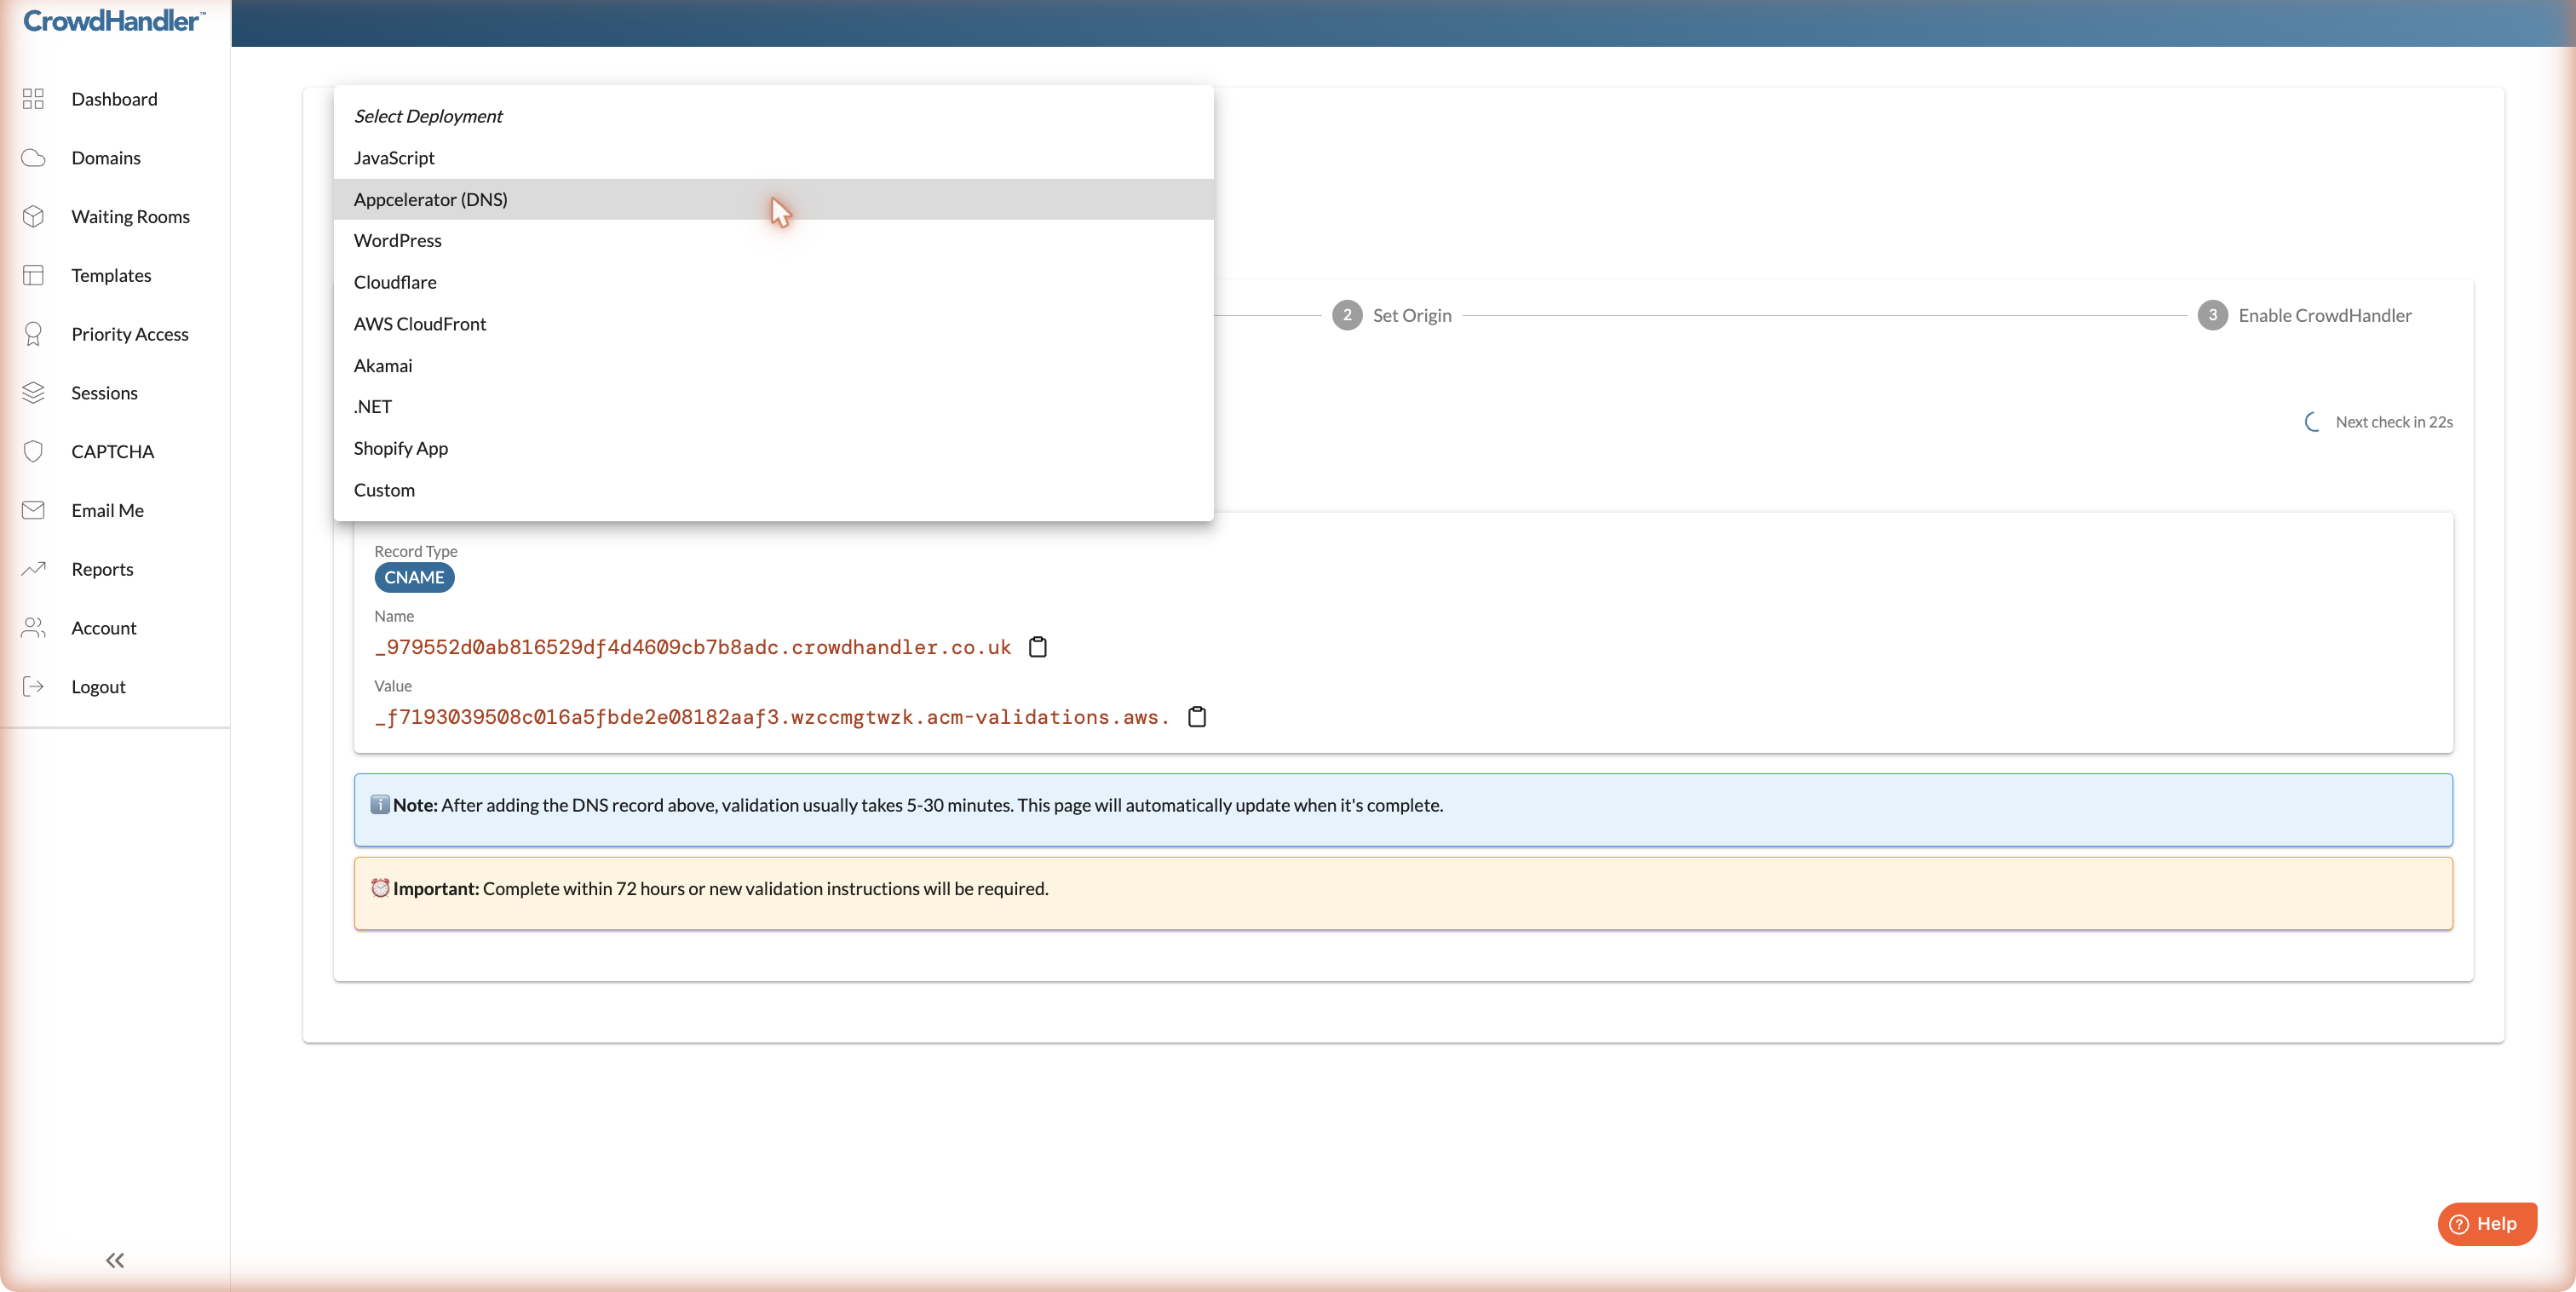
On the domain's settings page the Select Deployment drop-down defaults to JavaScript. Change it to Appcelerator (DNS).
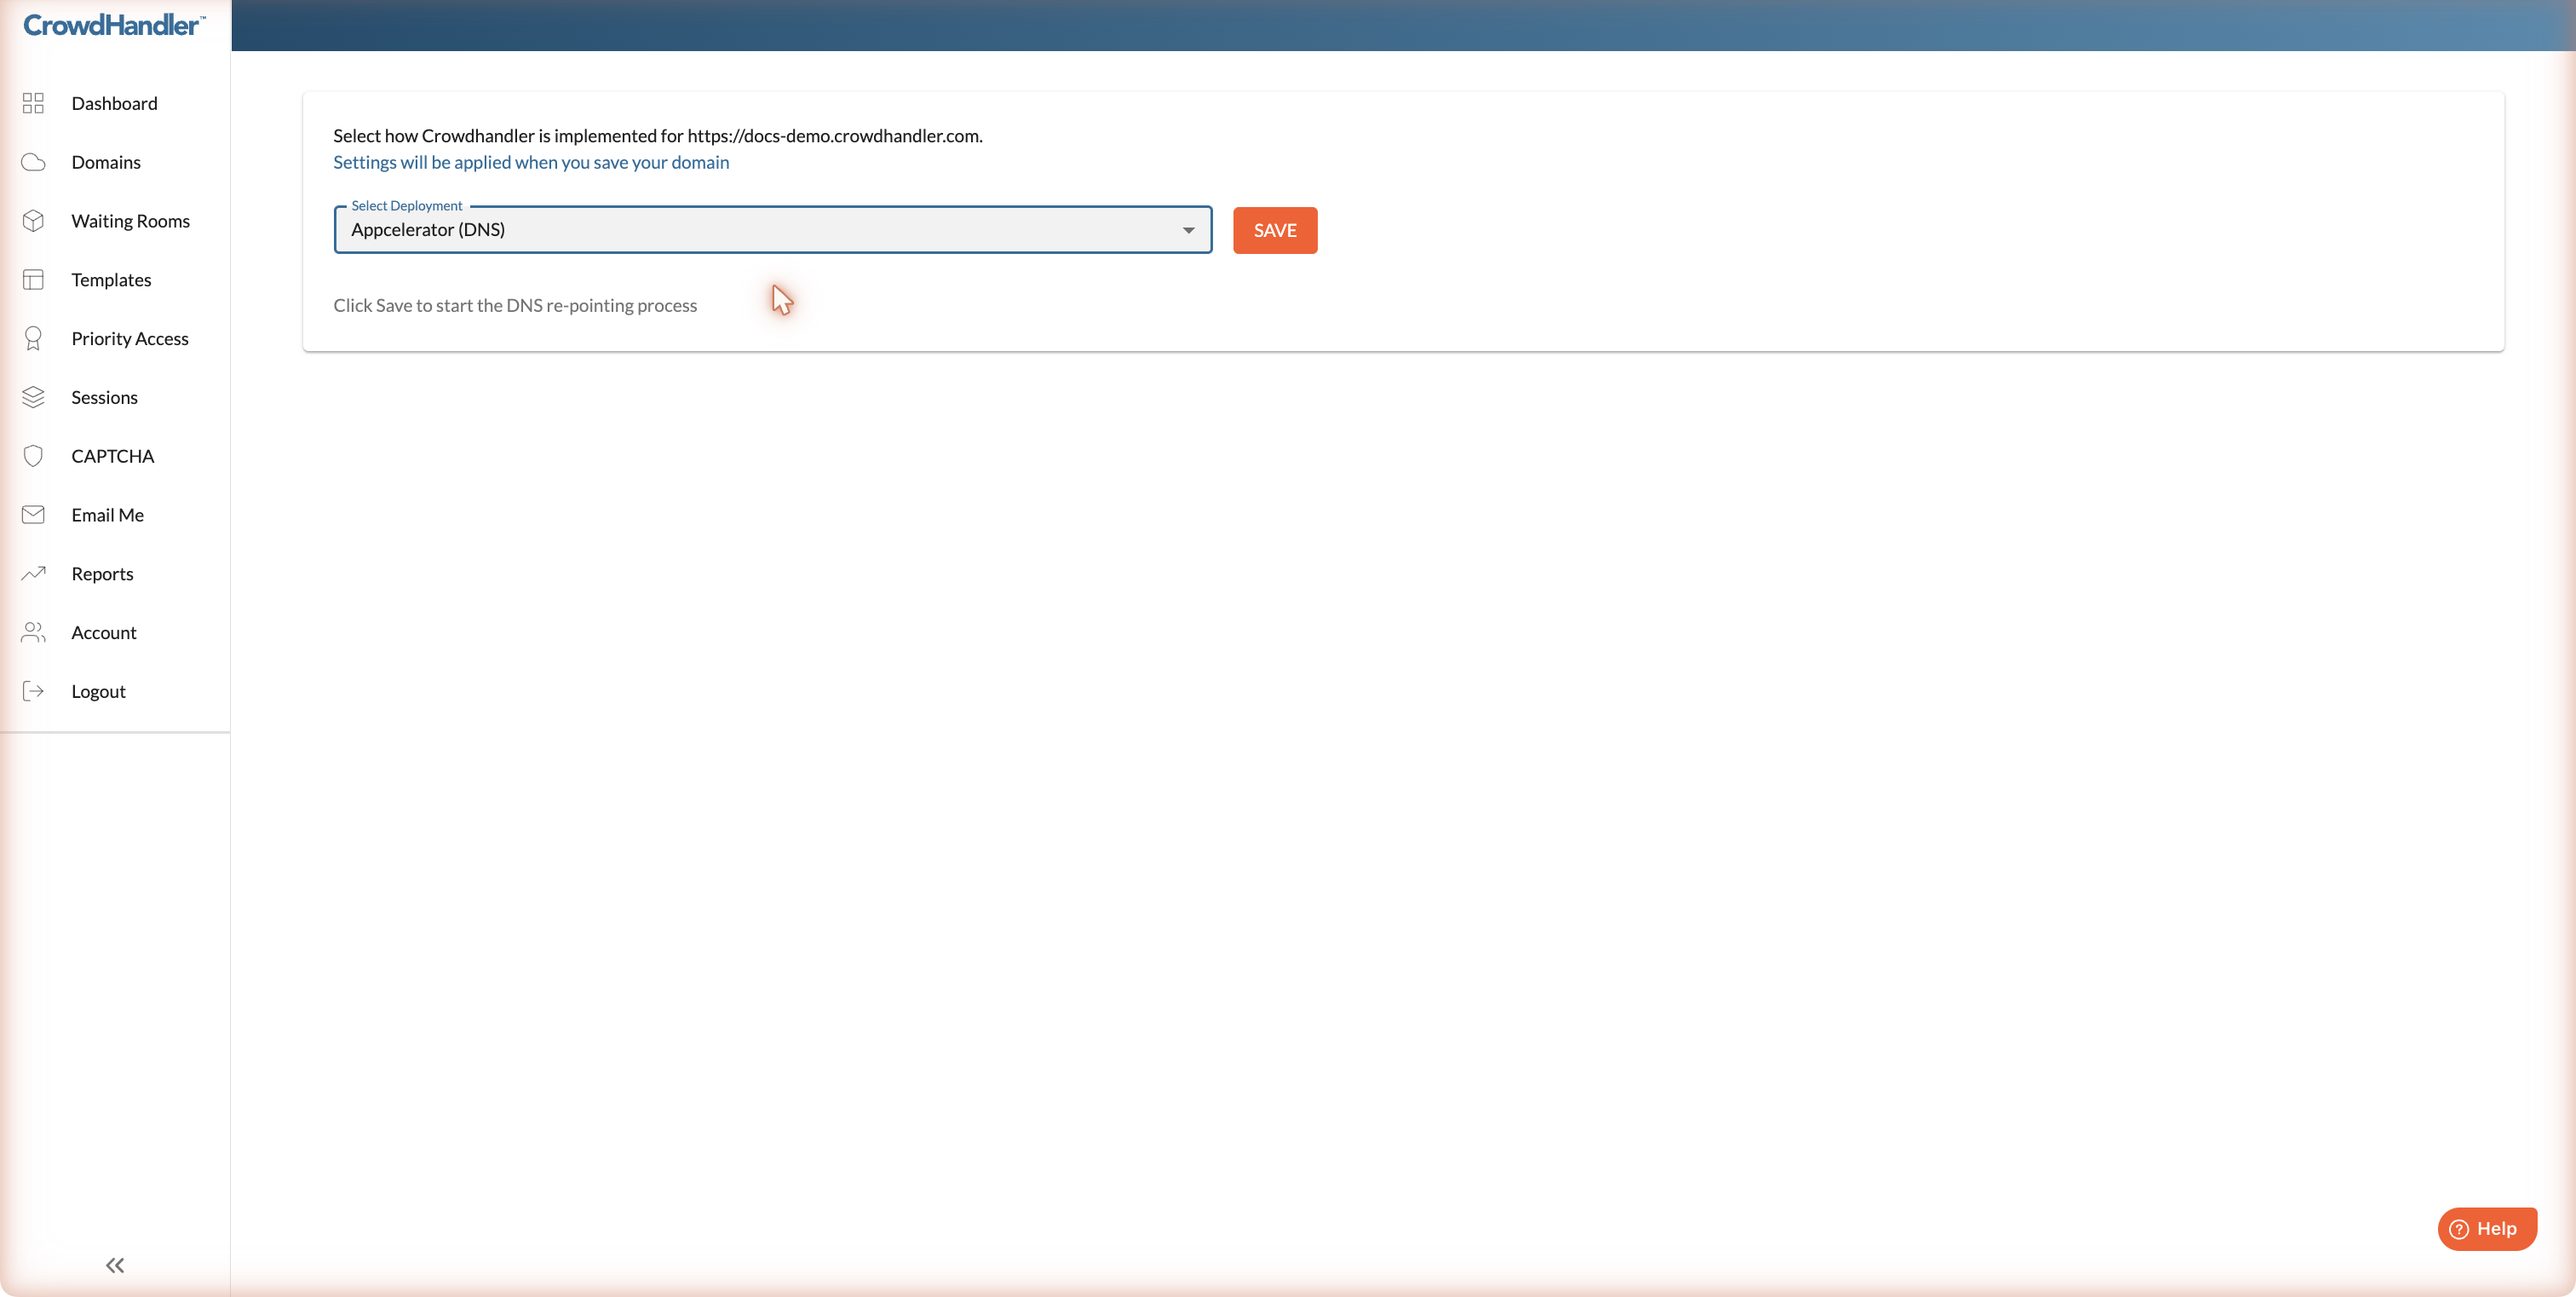
Click Save to start the onboarding process.
Apex domains: to protect an apex domain (for example example.com rather than www.example.com) your DNS provider must support CNAME flattening, ALIAS or ANAME records. Most modern providers do. Check with your provider before you start.
Step 2: Request and validate a TLS certificate
All traffic through CrowdHandler is served over HTTPS, so the first step is to issue a certificate for your domain.
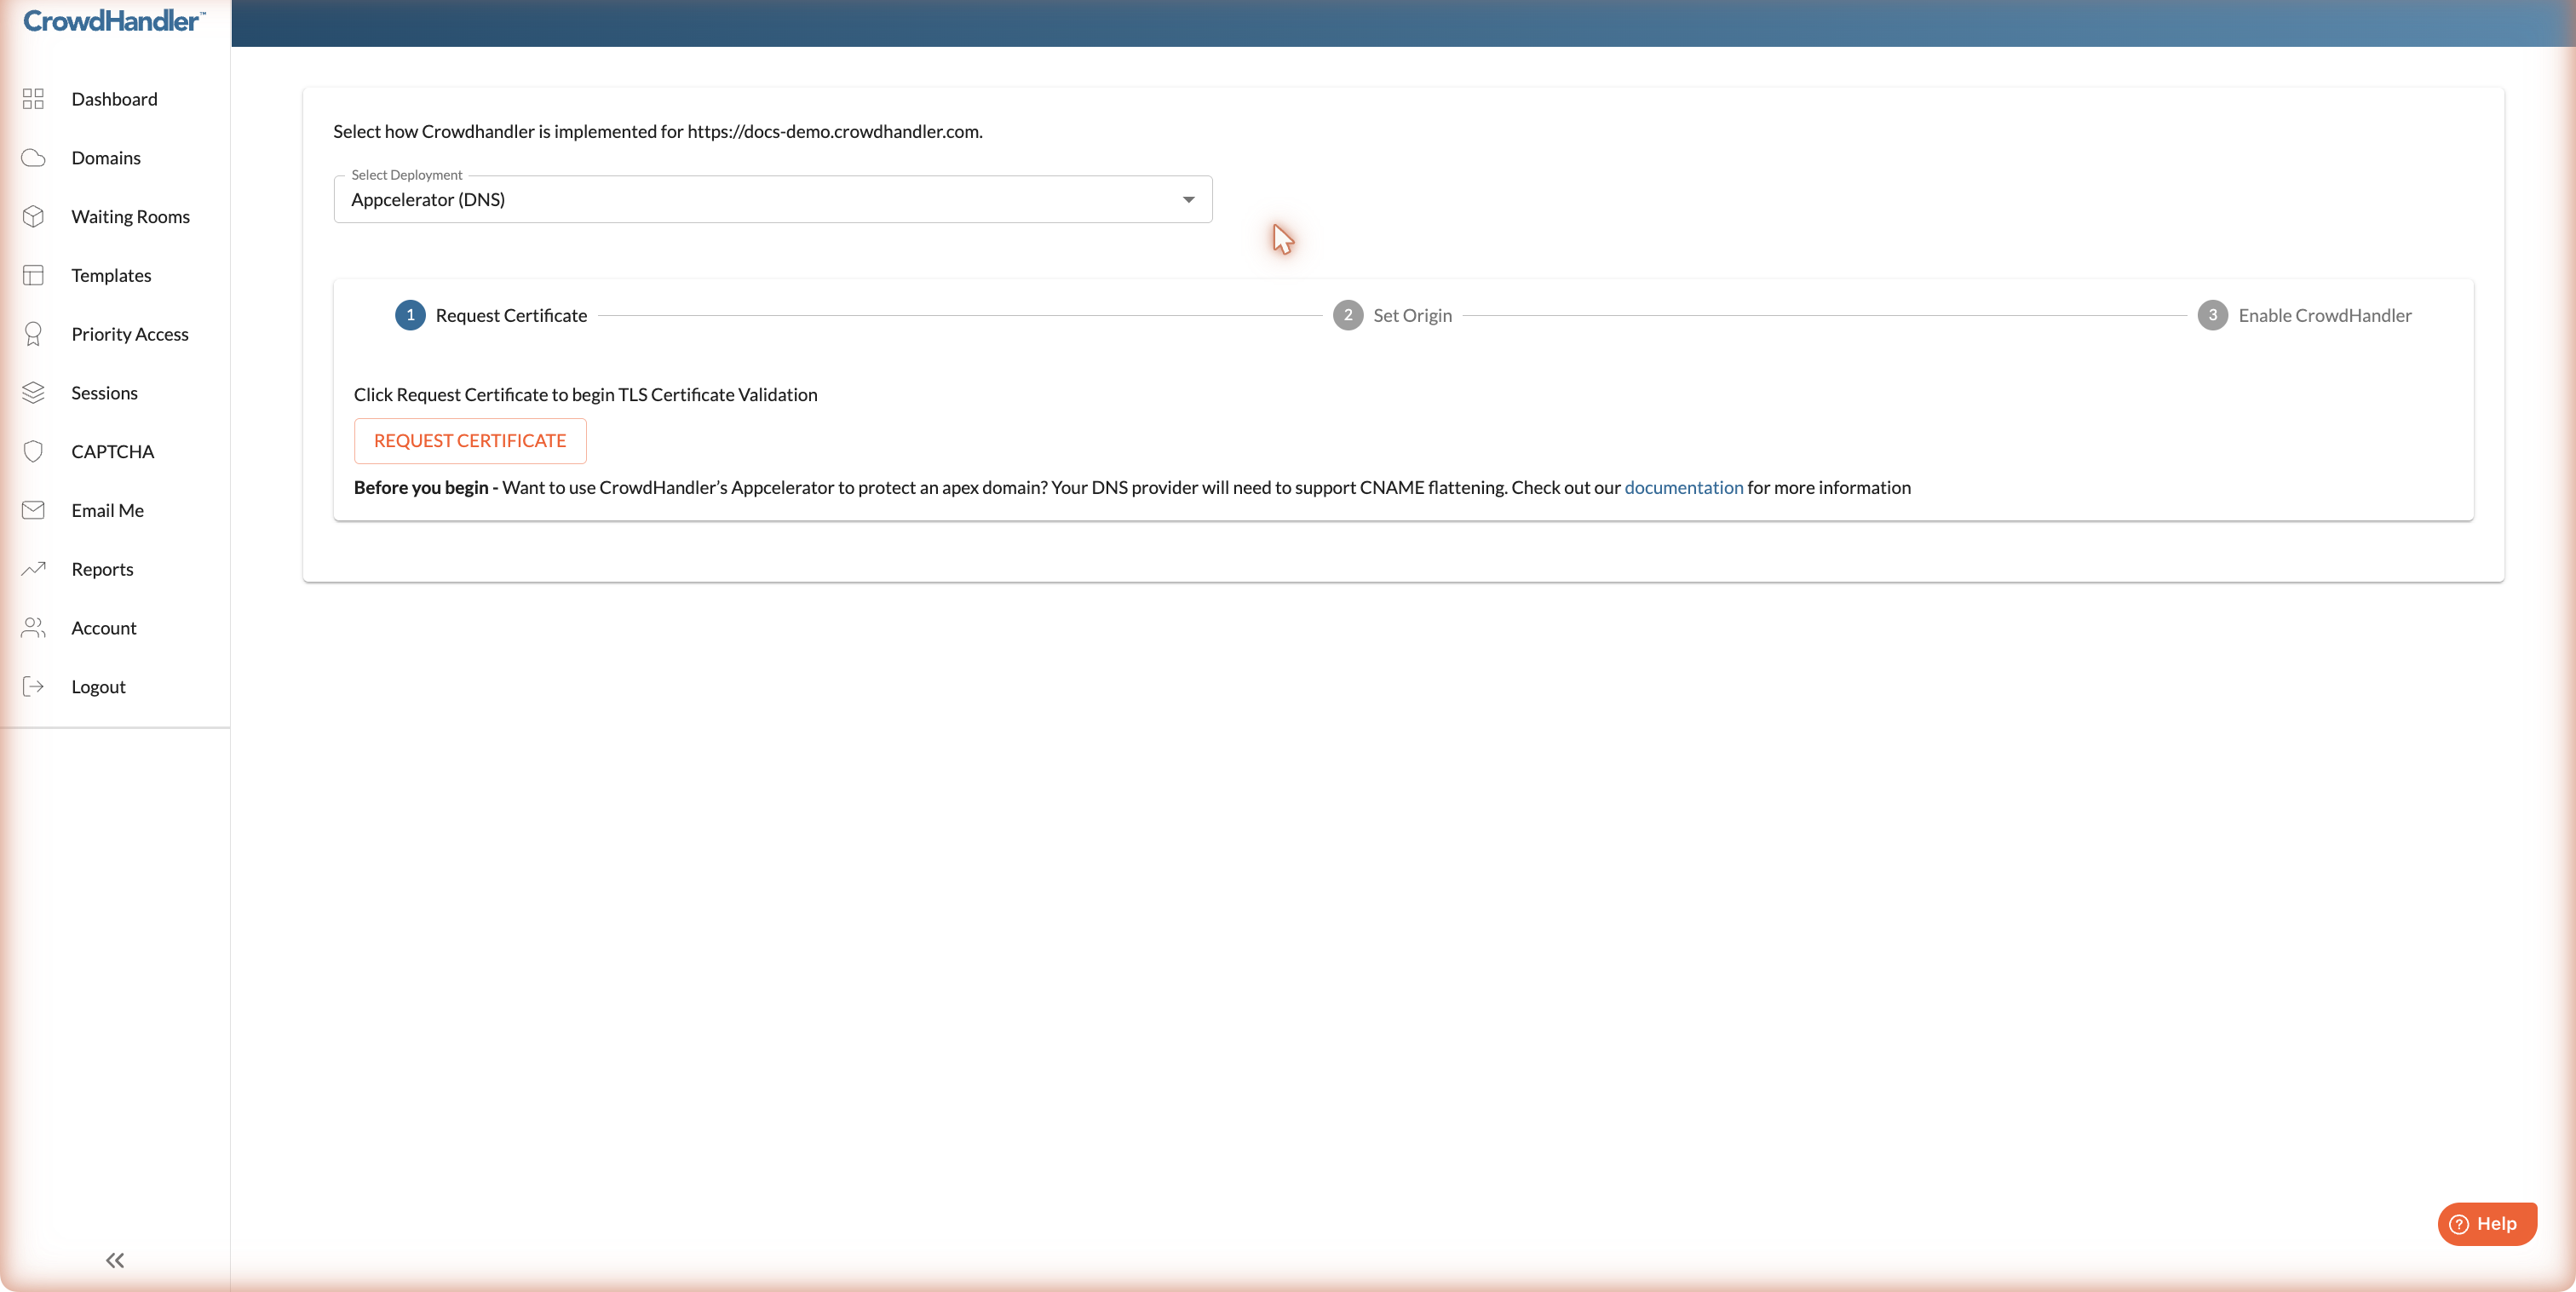
Click Request Certificate.
After a few seconds the page shows a CNAME record to add at your DNS provider. This proves you control the domain.
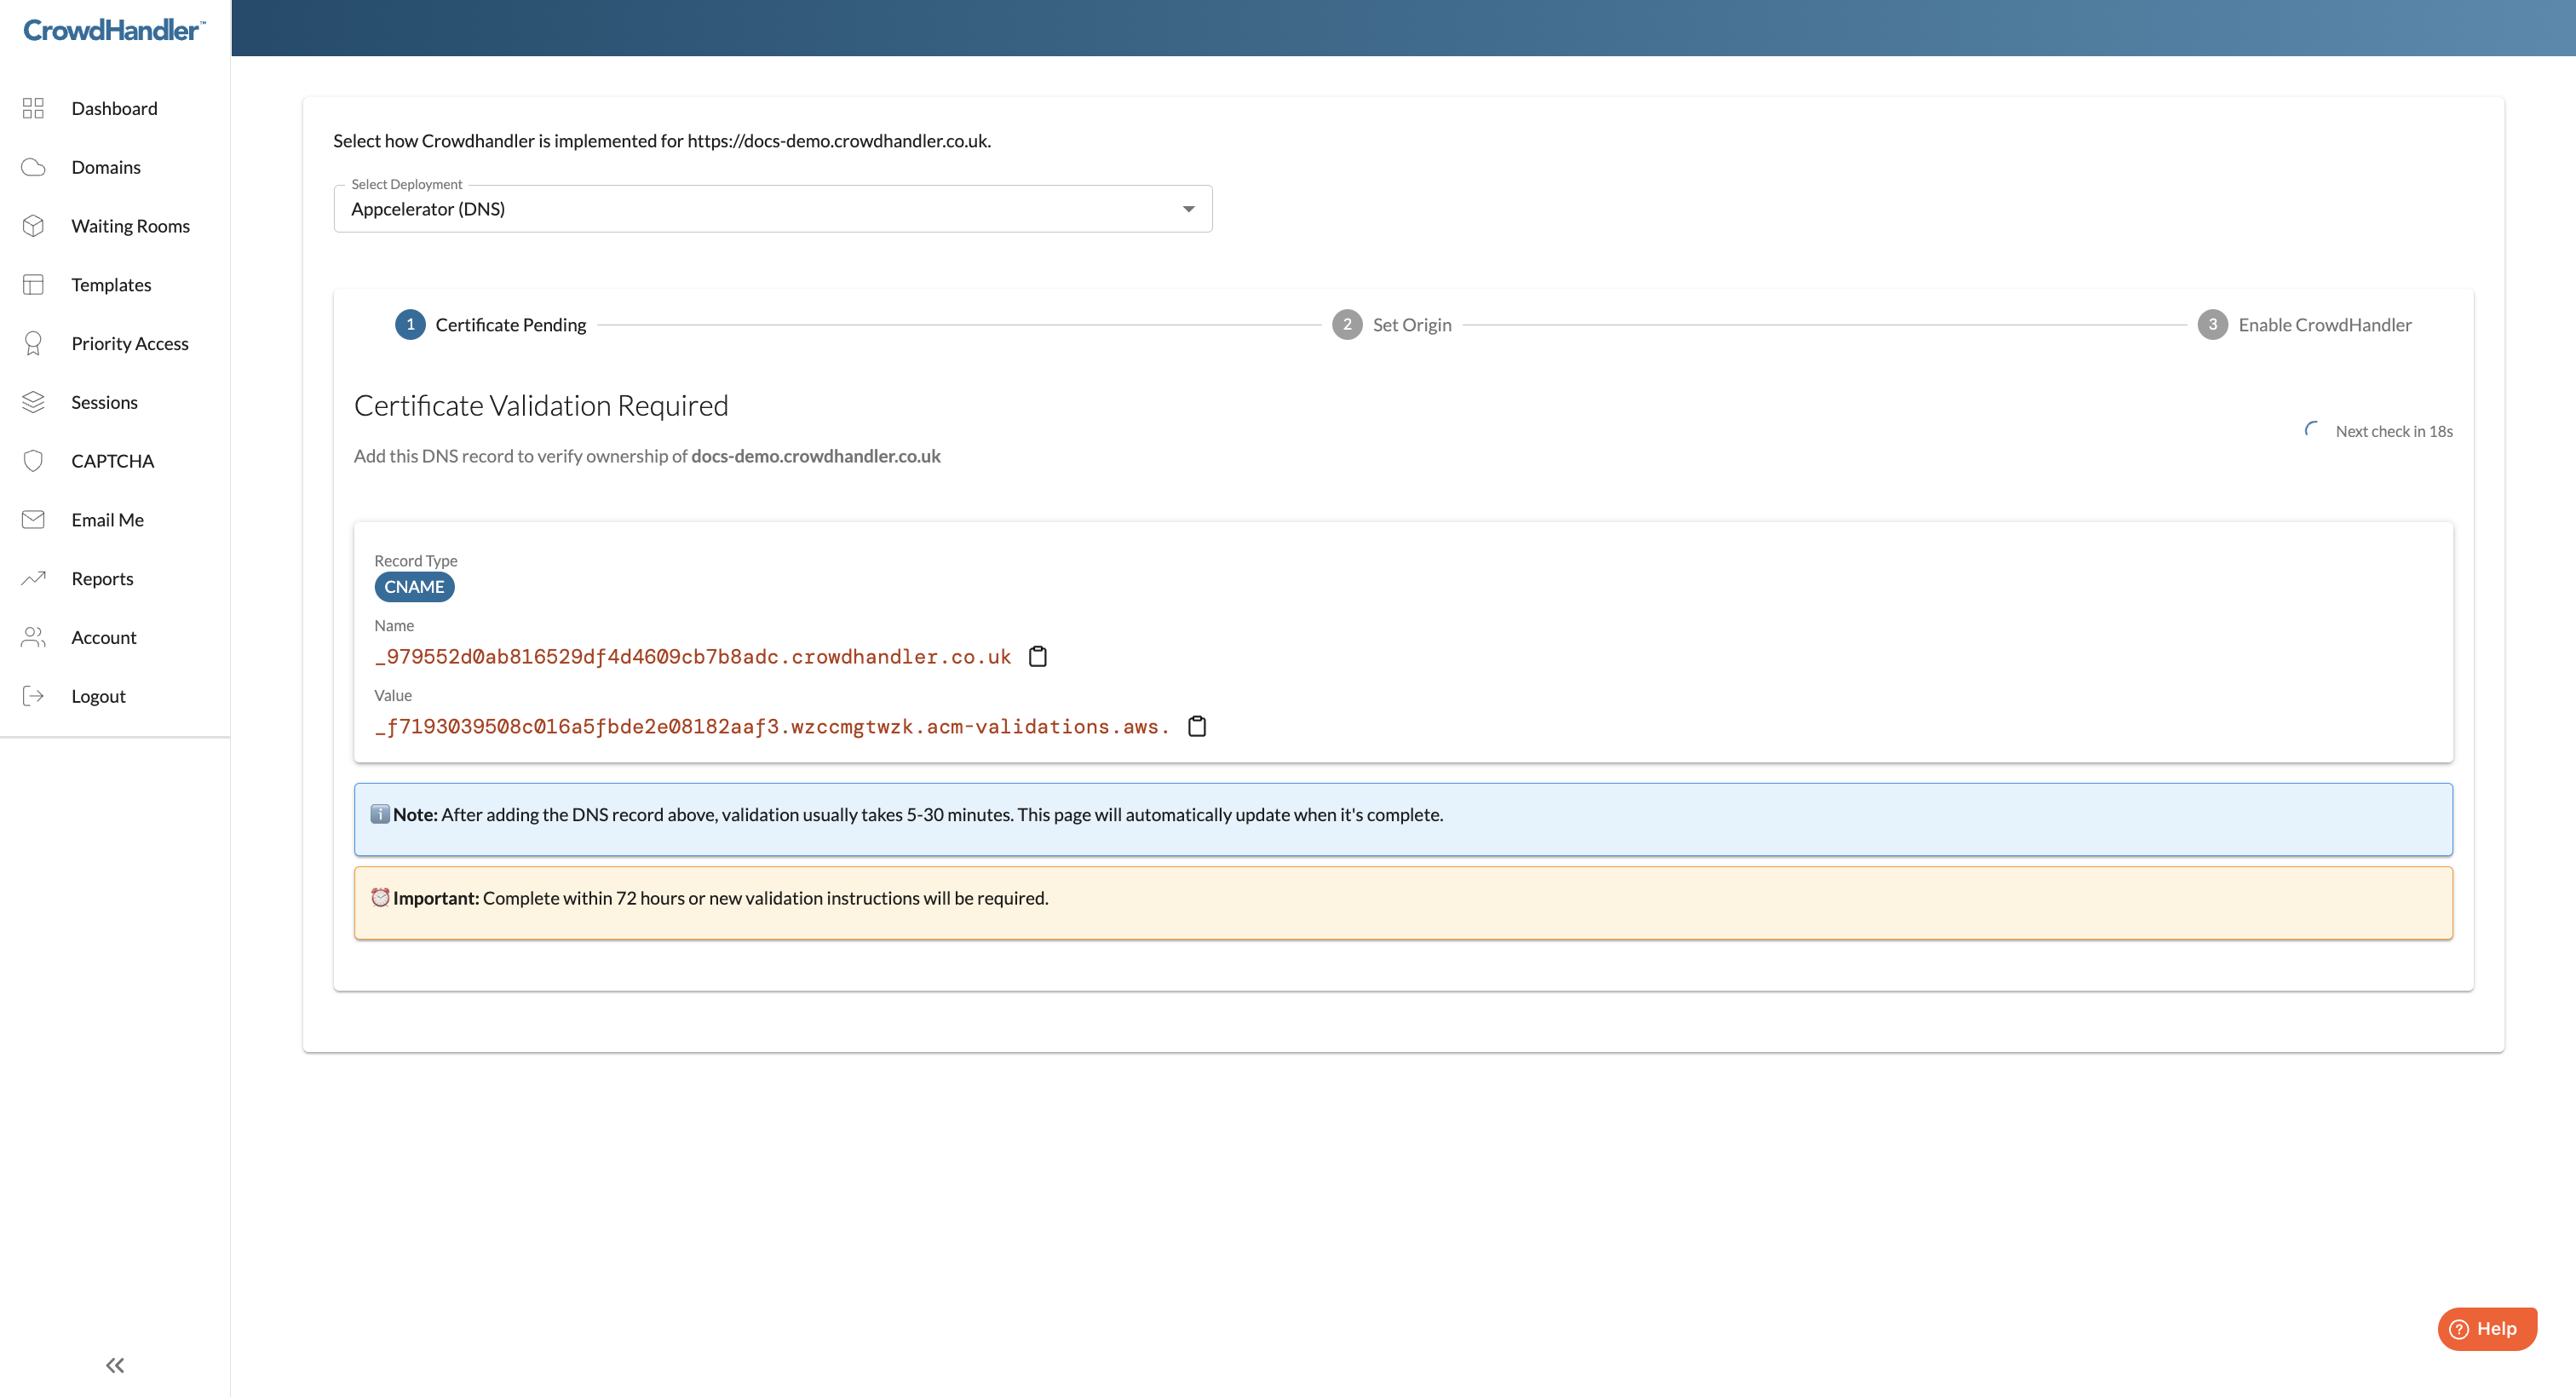
Add the record exactly as shown (use the copy buttons). Consult your DNS provider's documentation if you're unsure, or email support@crowdhandler.com and we'll help.
Validation usually completes within 5 to 30 minutes of the record going live, but can take longer depending on your provider. The page checks automatically and moves on when the certificate is issued. You can close the page and come back.
The validation record must be completed within 72 hours. After that the request expires and you'll be given a fresh record to add.
If CrowdHandler has previously issued a certificate covering your domain, this step is skipped and you'll go straight to Step 3.
Step 3: Set your origin
Your origin is the hostname of the web server, load balancer or CDN that CrowdHandler should send traffic to. Once the certificate is issued the wizard moves to Set Origin.
CrowdHandler will try to detect your origin automatically from your current DNS. If it can't, or if it picks the wrong thing, type the correct hostname.
Origins must be hostnames. IP addresses are rejected. If your server only has an IP address, create a subdomain that resolves to it (for example origin.example.com) and use that.
Click Continue. CrowdHandler starts building your dedicated endpoint, which takes roughly 10 to 15 minutes. The page updates automatically.
Step 4: Test, then go live
When the distribution is ready the wizard shows the Go Live panel with the DNS record you'll need to add.
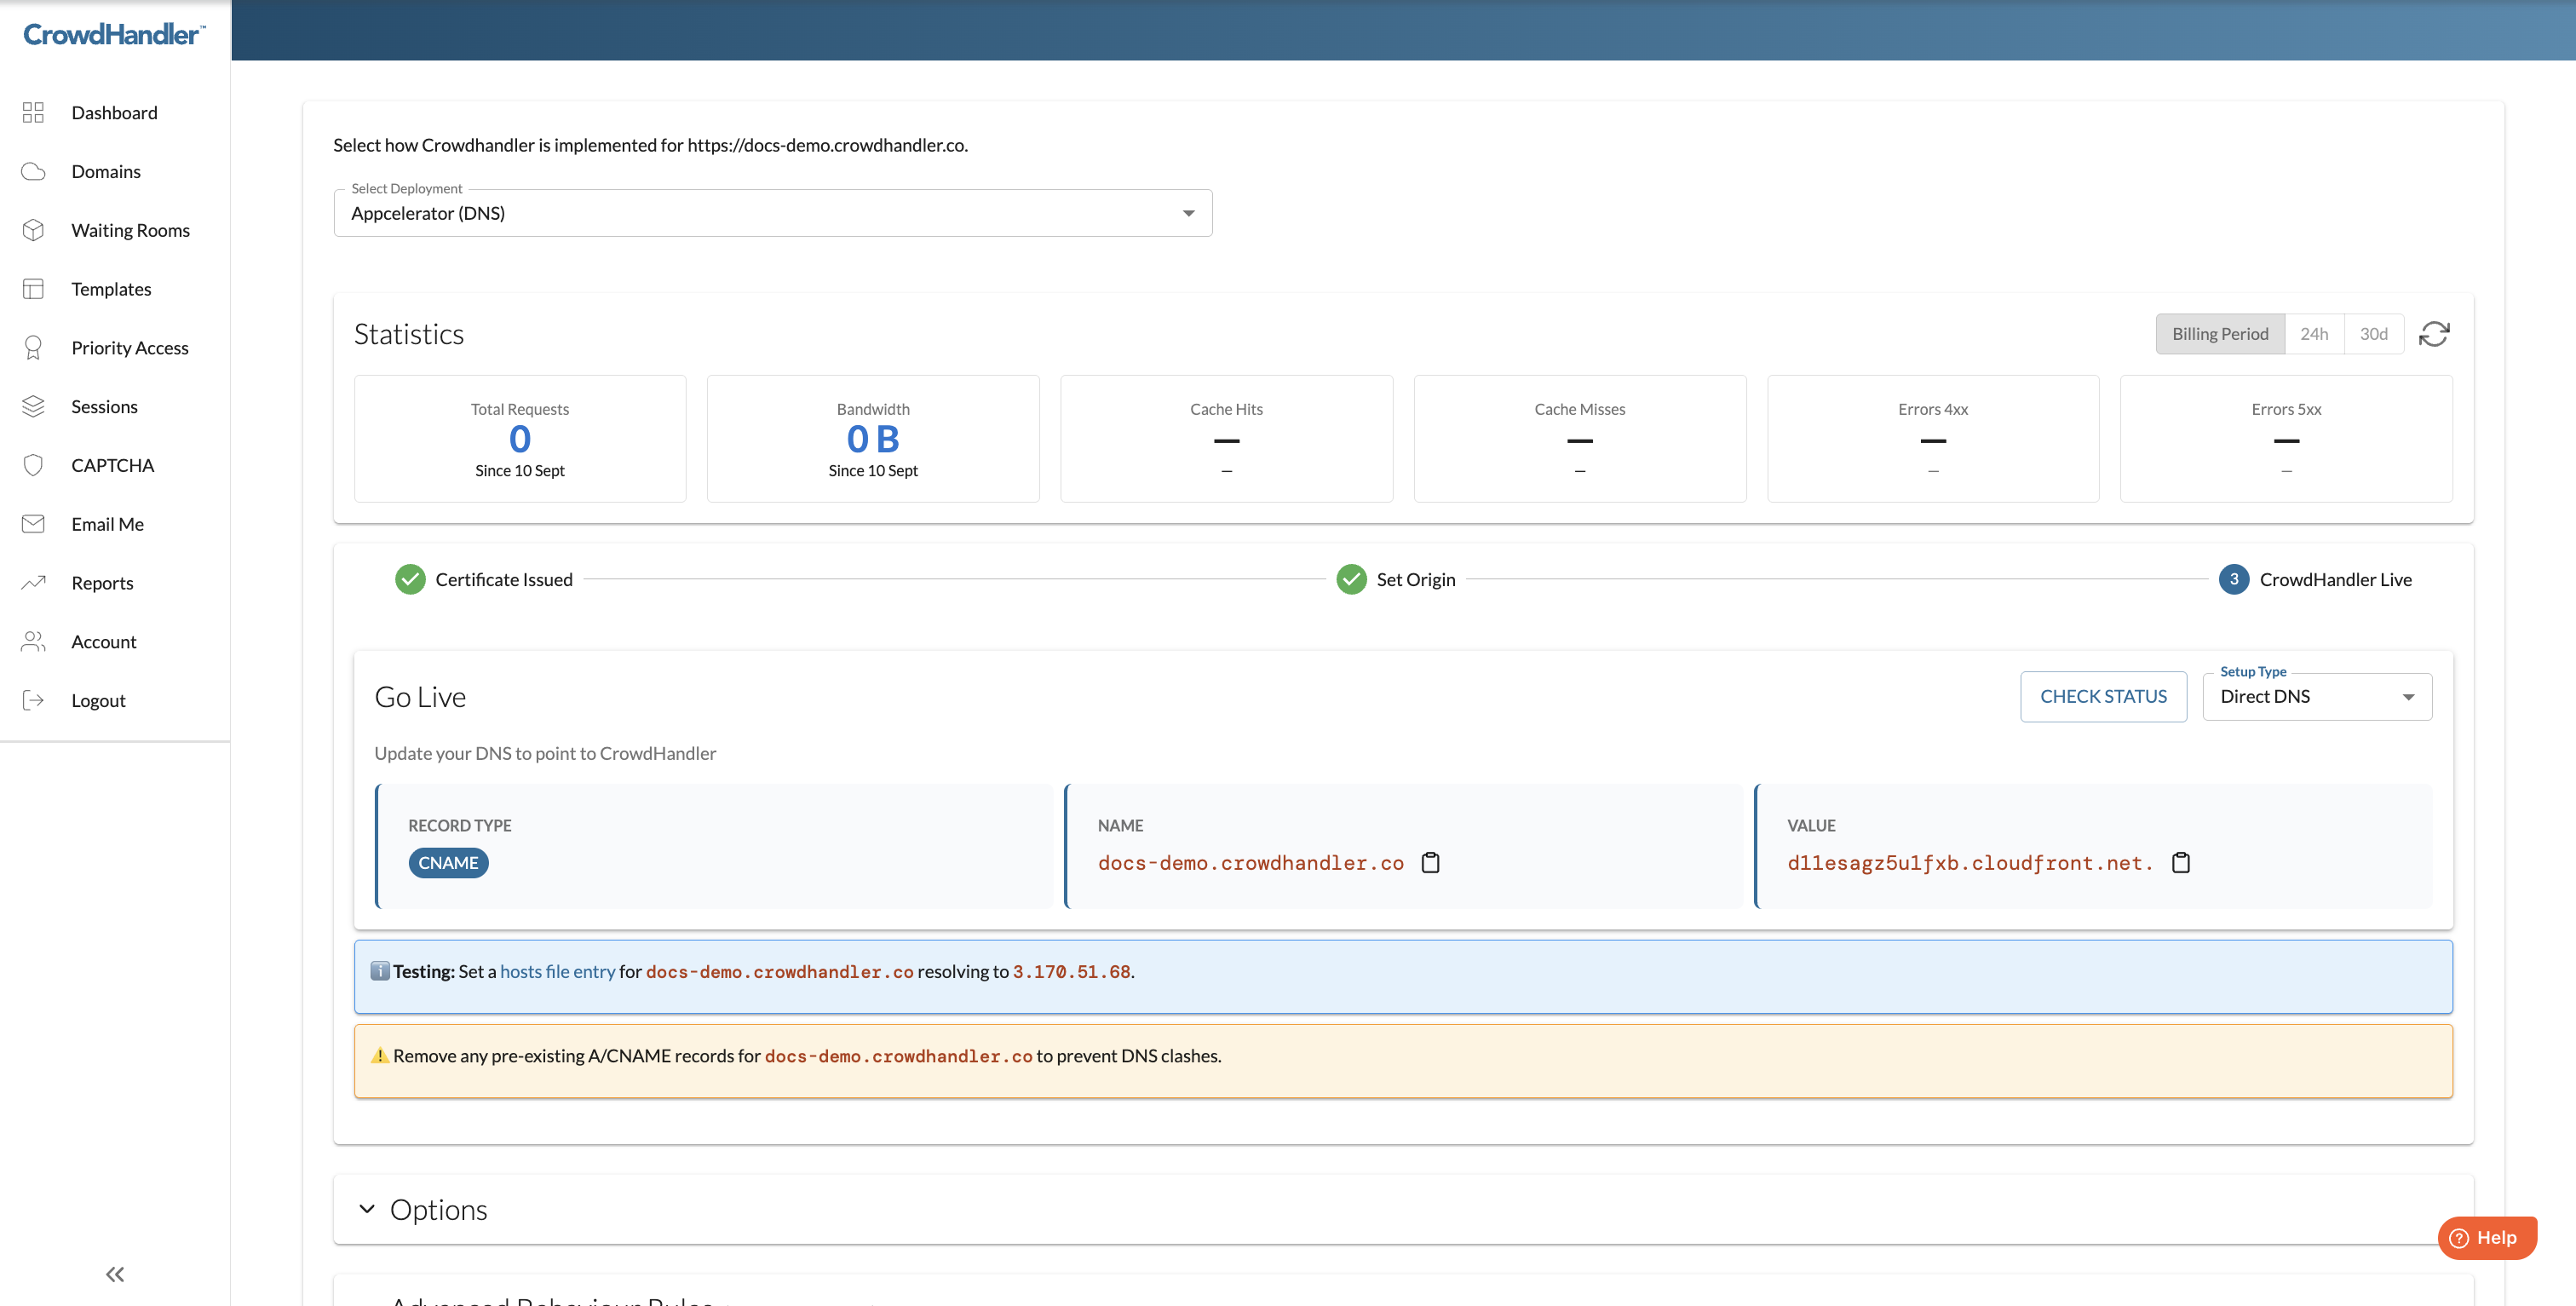
Test first. The blue Testing box gives you a hosts-file entry. Add it on your own machine and your browser will route through CrowdHandler while the rest of the world still hits your site directly. Browse the site, check that pages, assets and any logged-in areas behave, and try a waiting room. Remove the hosts-file entry when you're finished.
Then go live. In your DNS provider, replace the existing A or CNAME record for the domain with the CNAME shown in the Go Live panel. Remove any other A or CNAME records for the same name so they don't clash.
Click Check Status at any time to confirm whether public DNS is pointing at CrowdHandler yet.
Setup type: Direct DNS, Cloudflare or Imperva
The Setup Type drop-down in the Go Live panel changes the instructions to match where your DNS lives.
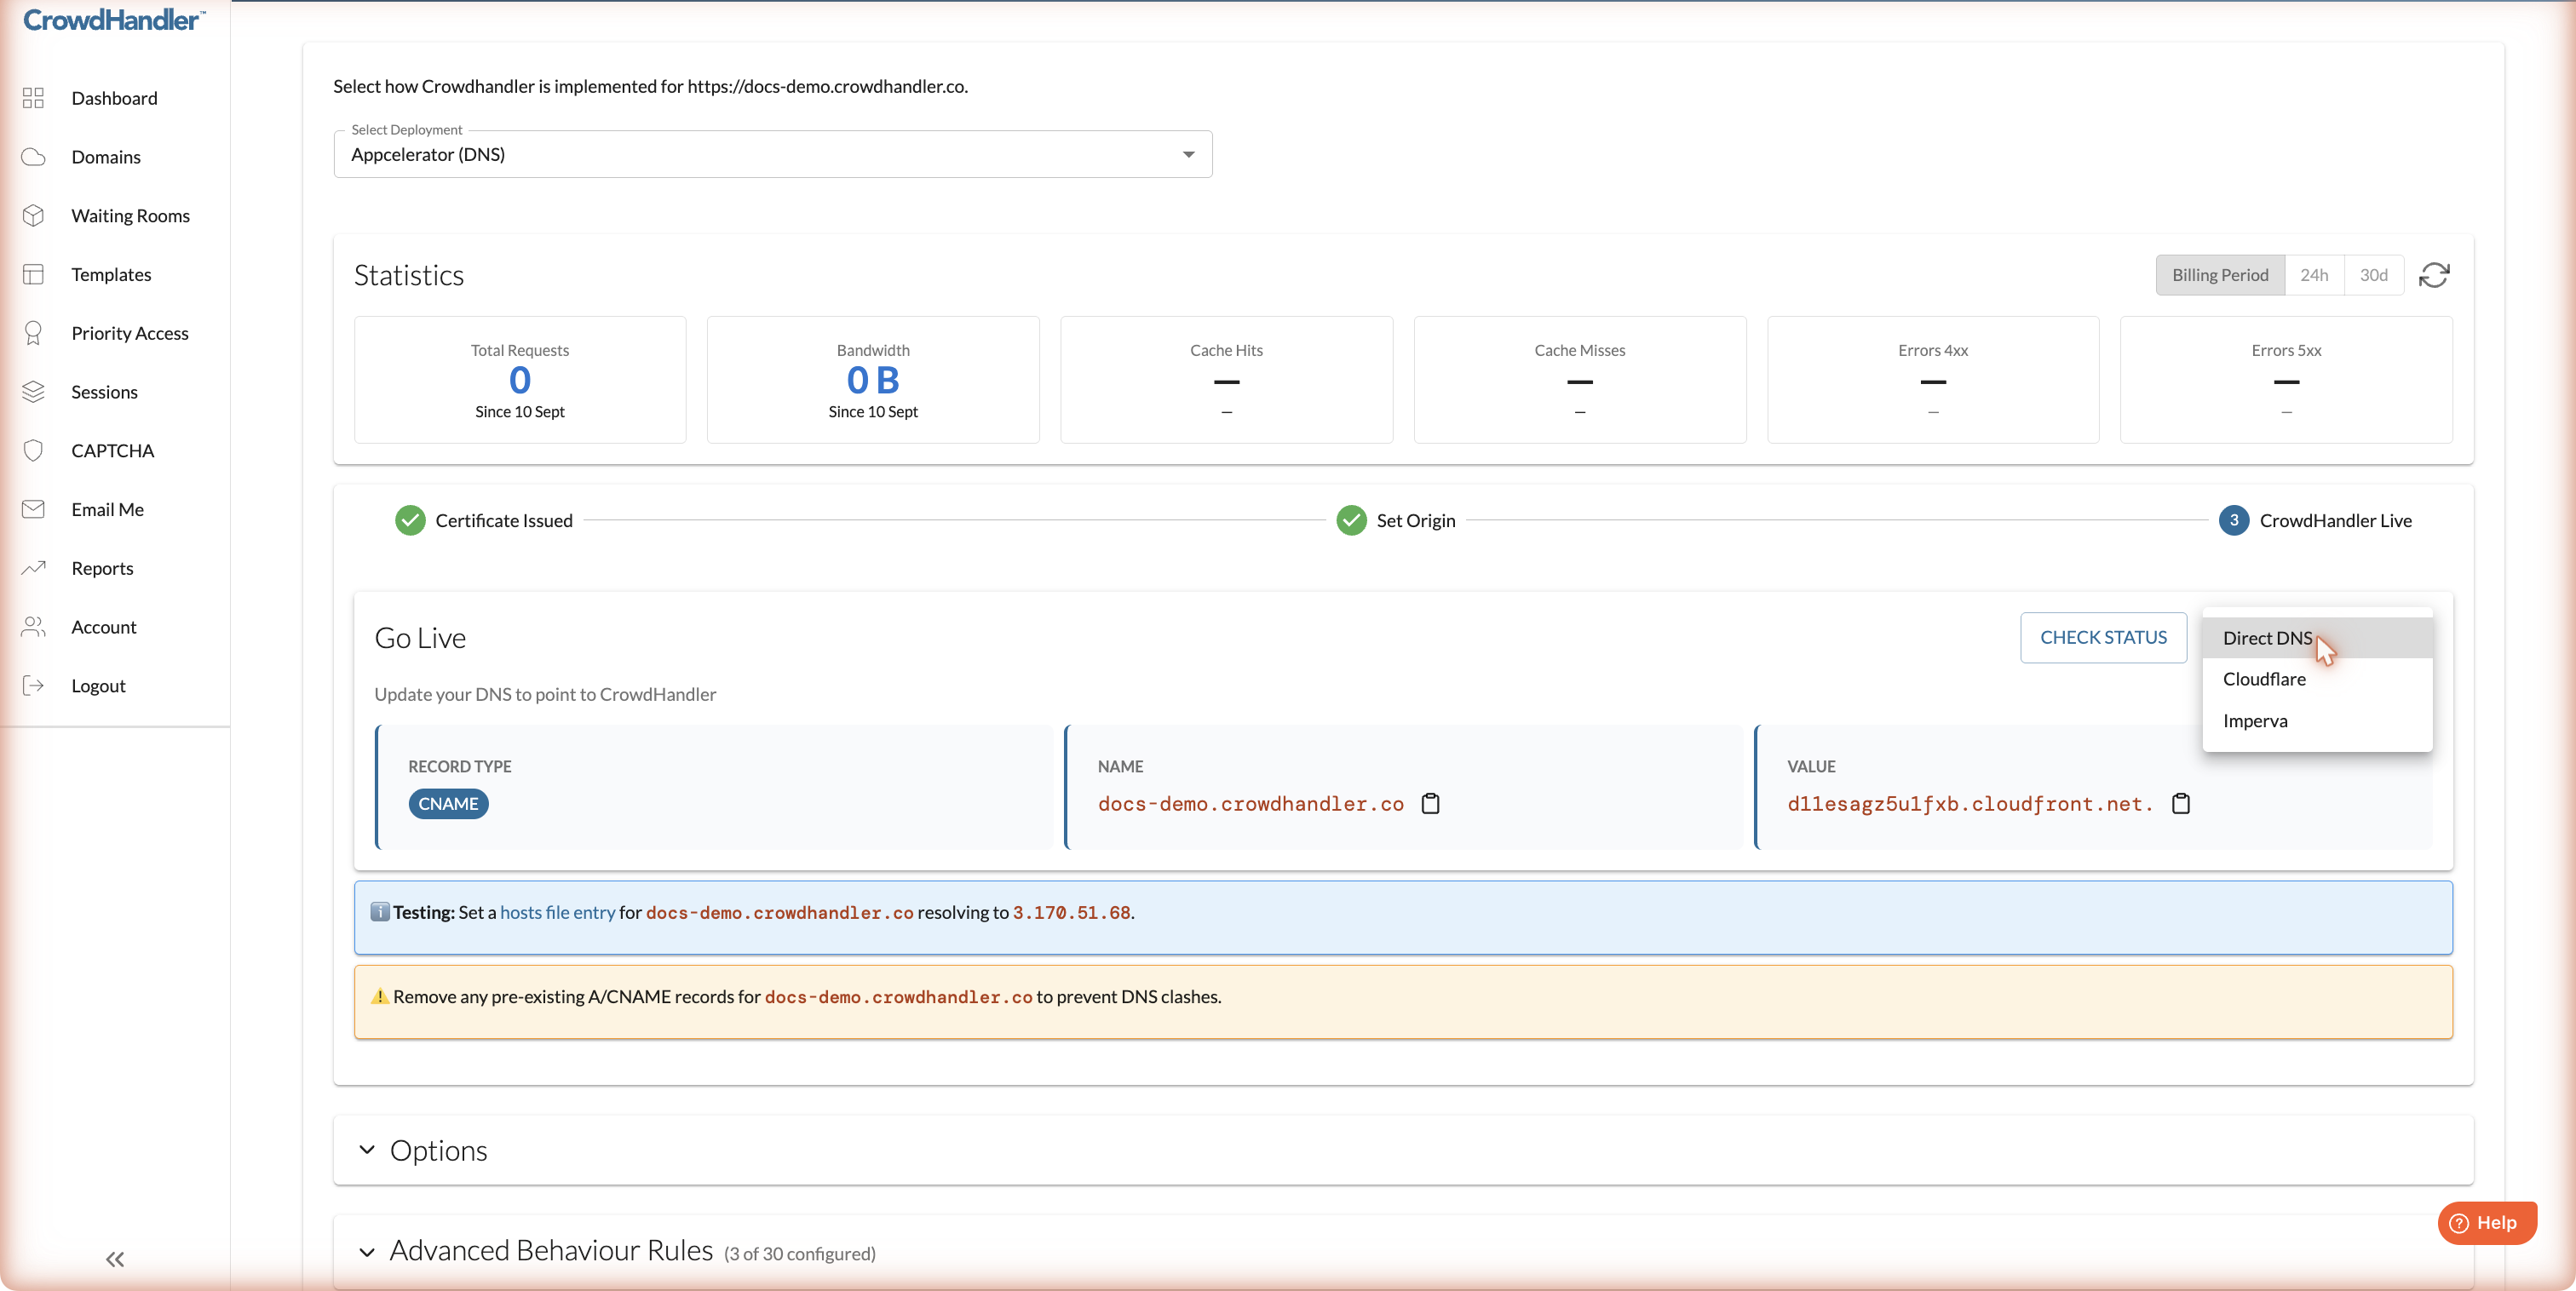
- Direct DNS (default): you point your DNS record straight at CrowdHandler as described above.
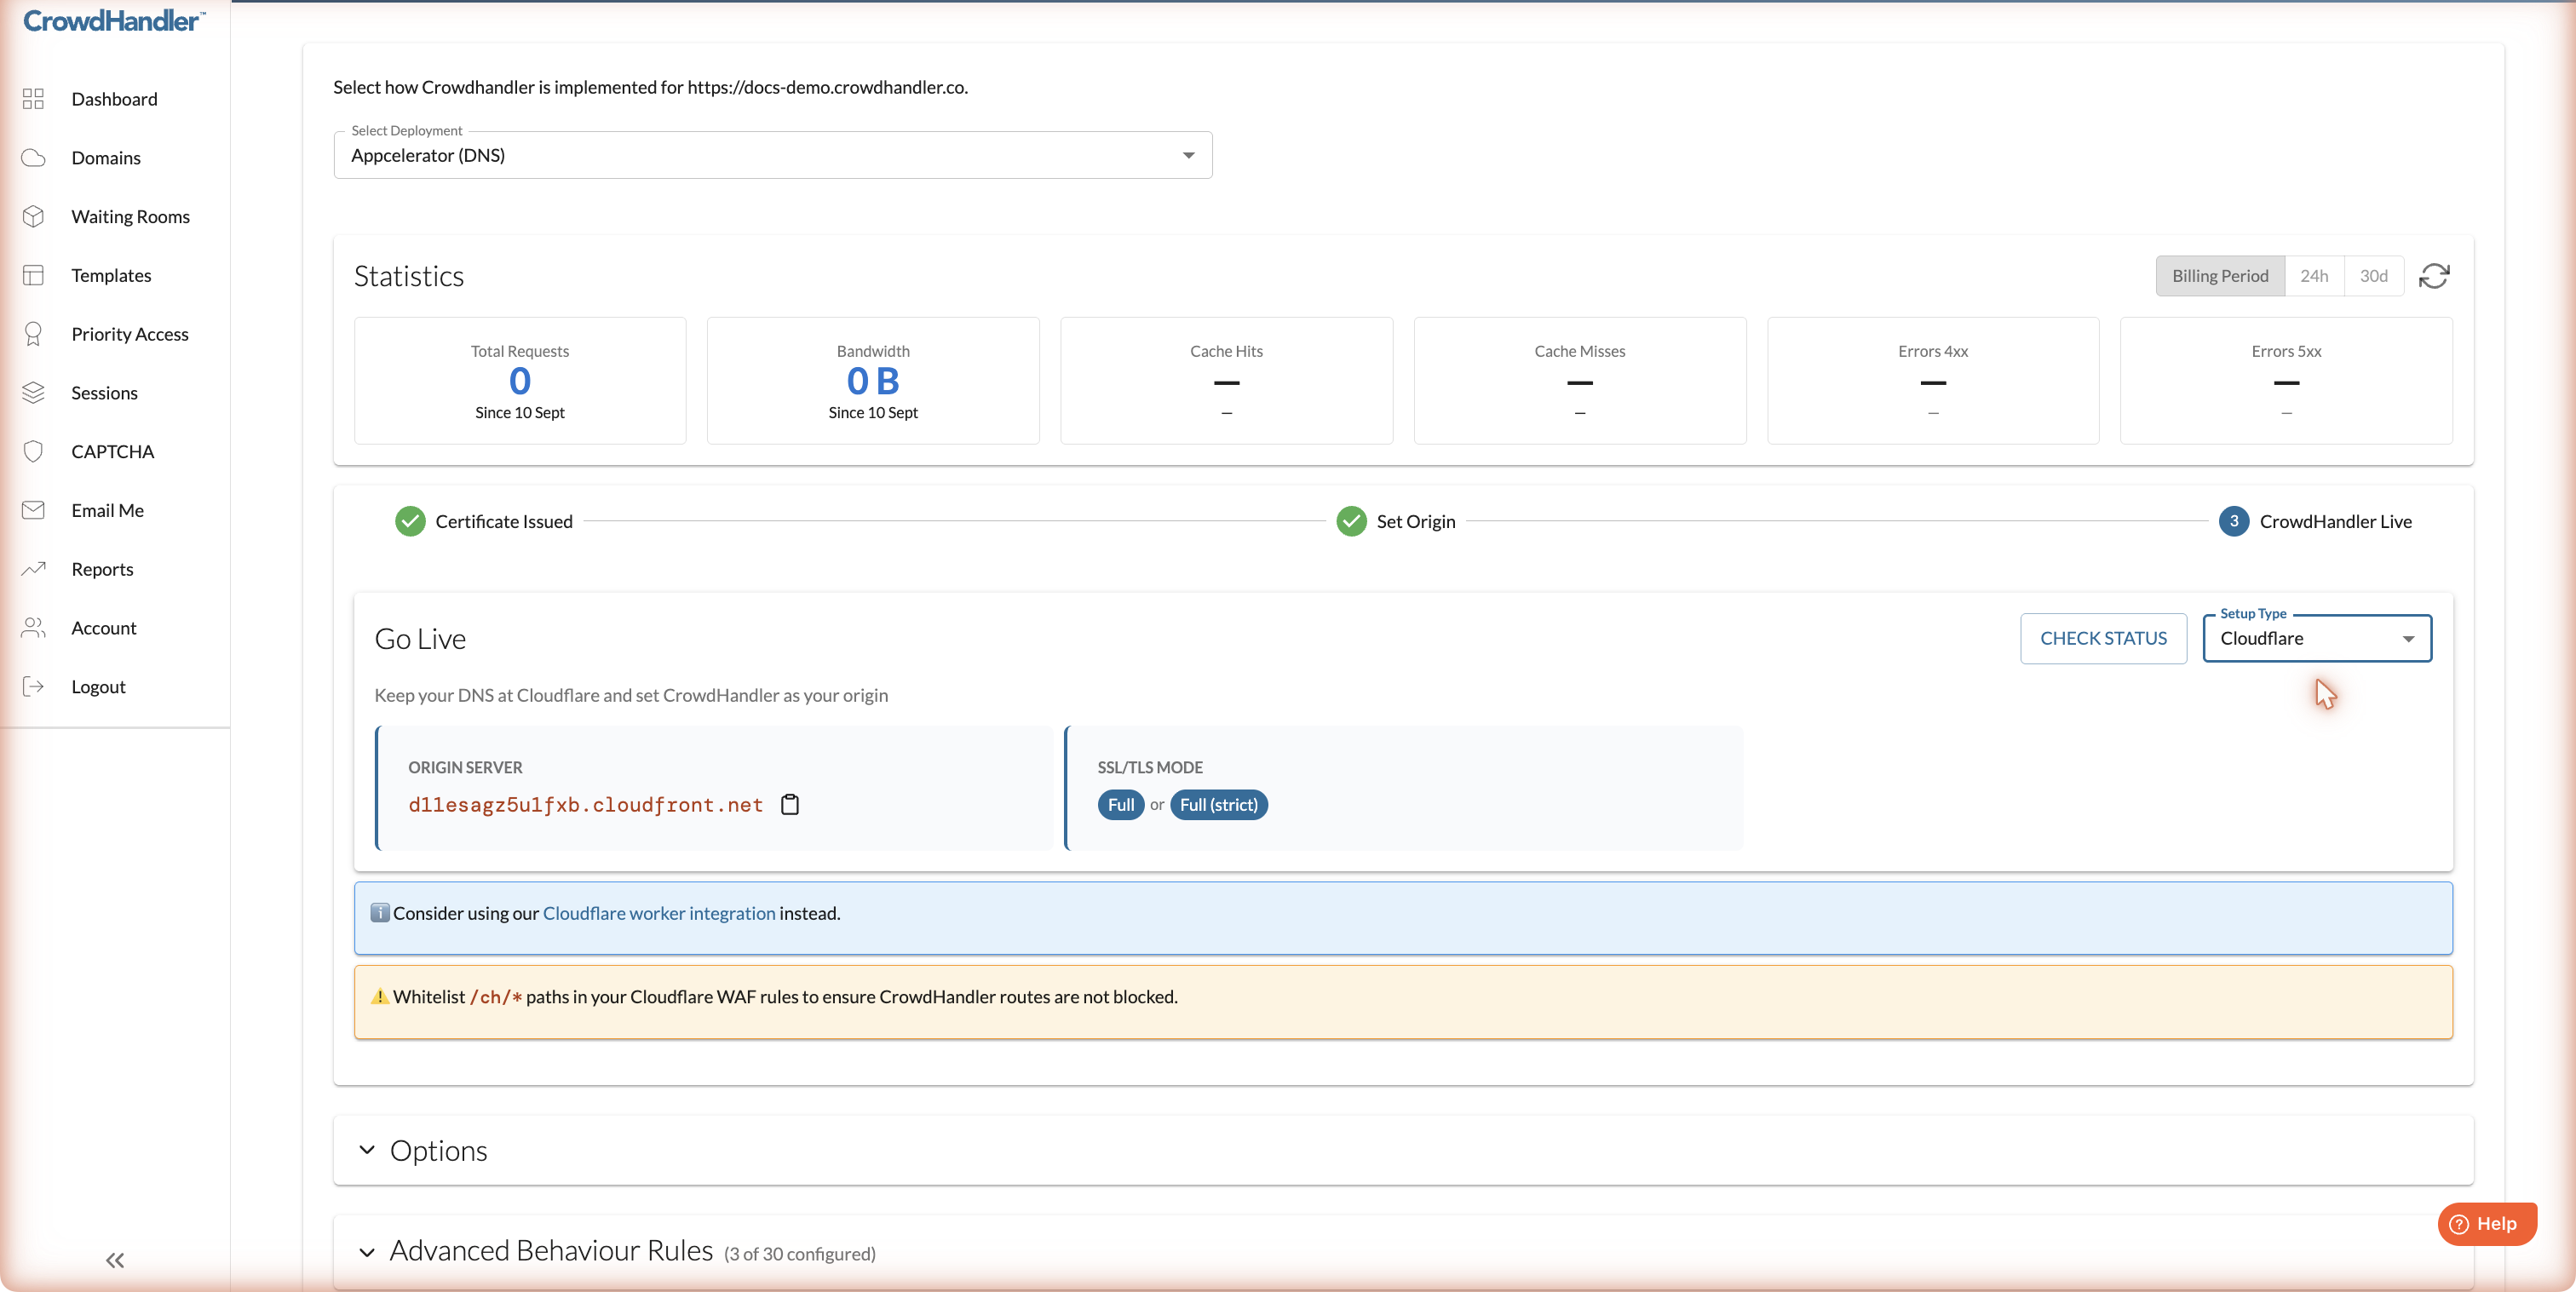
- Cloudflare: keep your DNS at Cloudflare and set CrowdHandler as the origin in Cloudflare. Set SSL/TLS mode to Full (strict). If you're on Cloudflare, also consider our Cloudflare worker integration, which avoids a second proxy hop.
- Imperva: keep your DNS at Imperva and set CrowdHandler as the origin server in Imperva. See our Imperva guide.
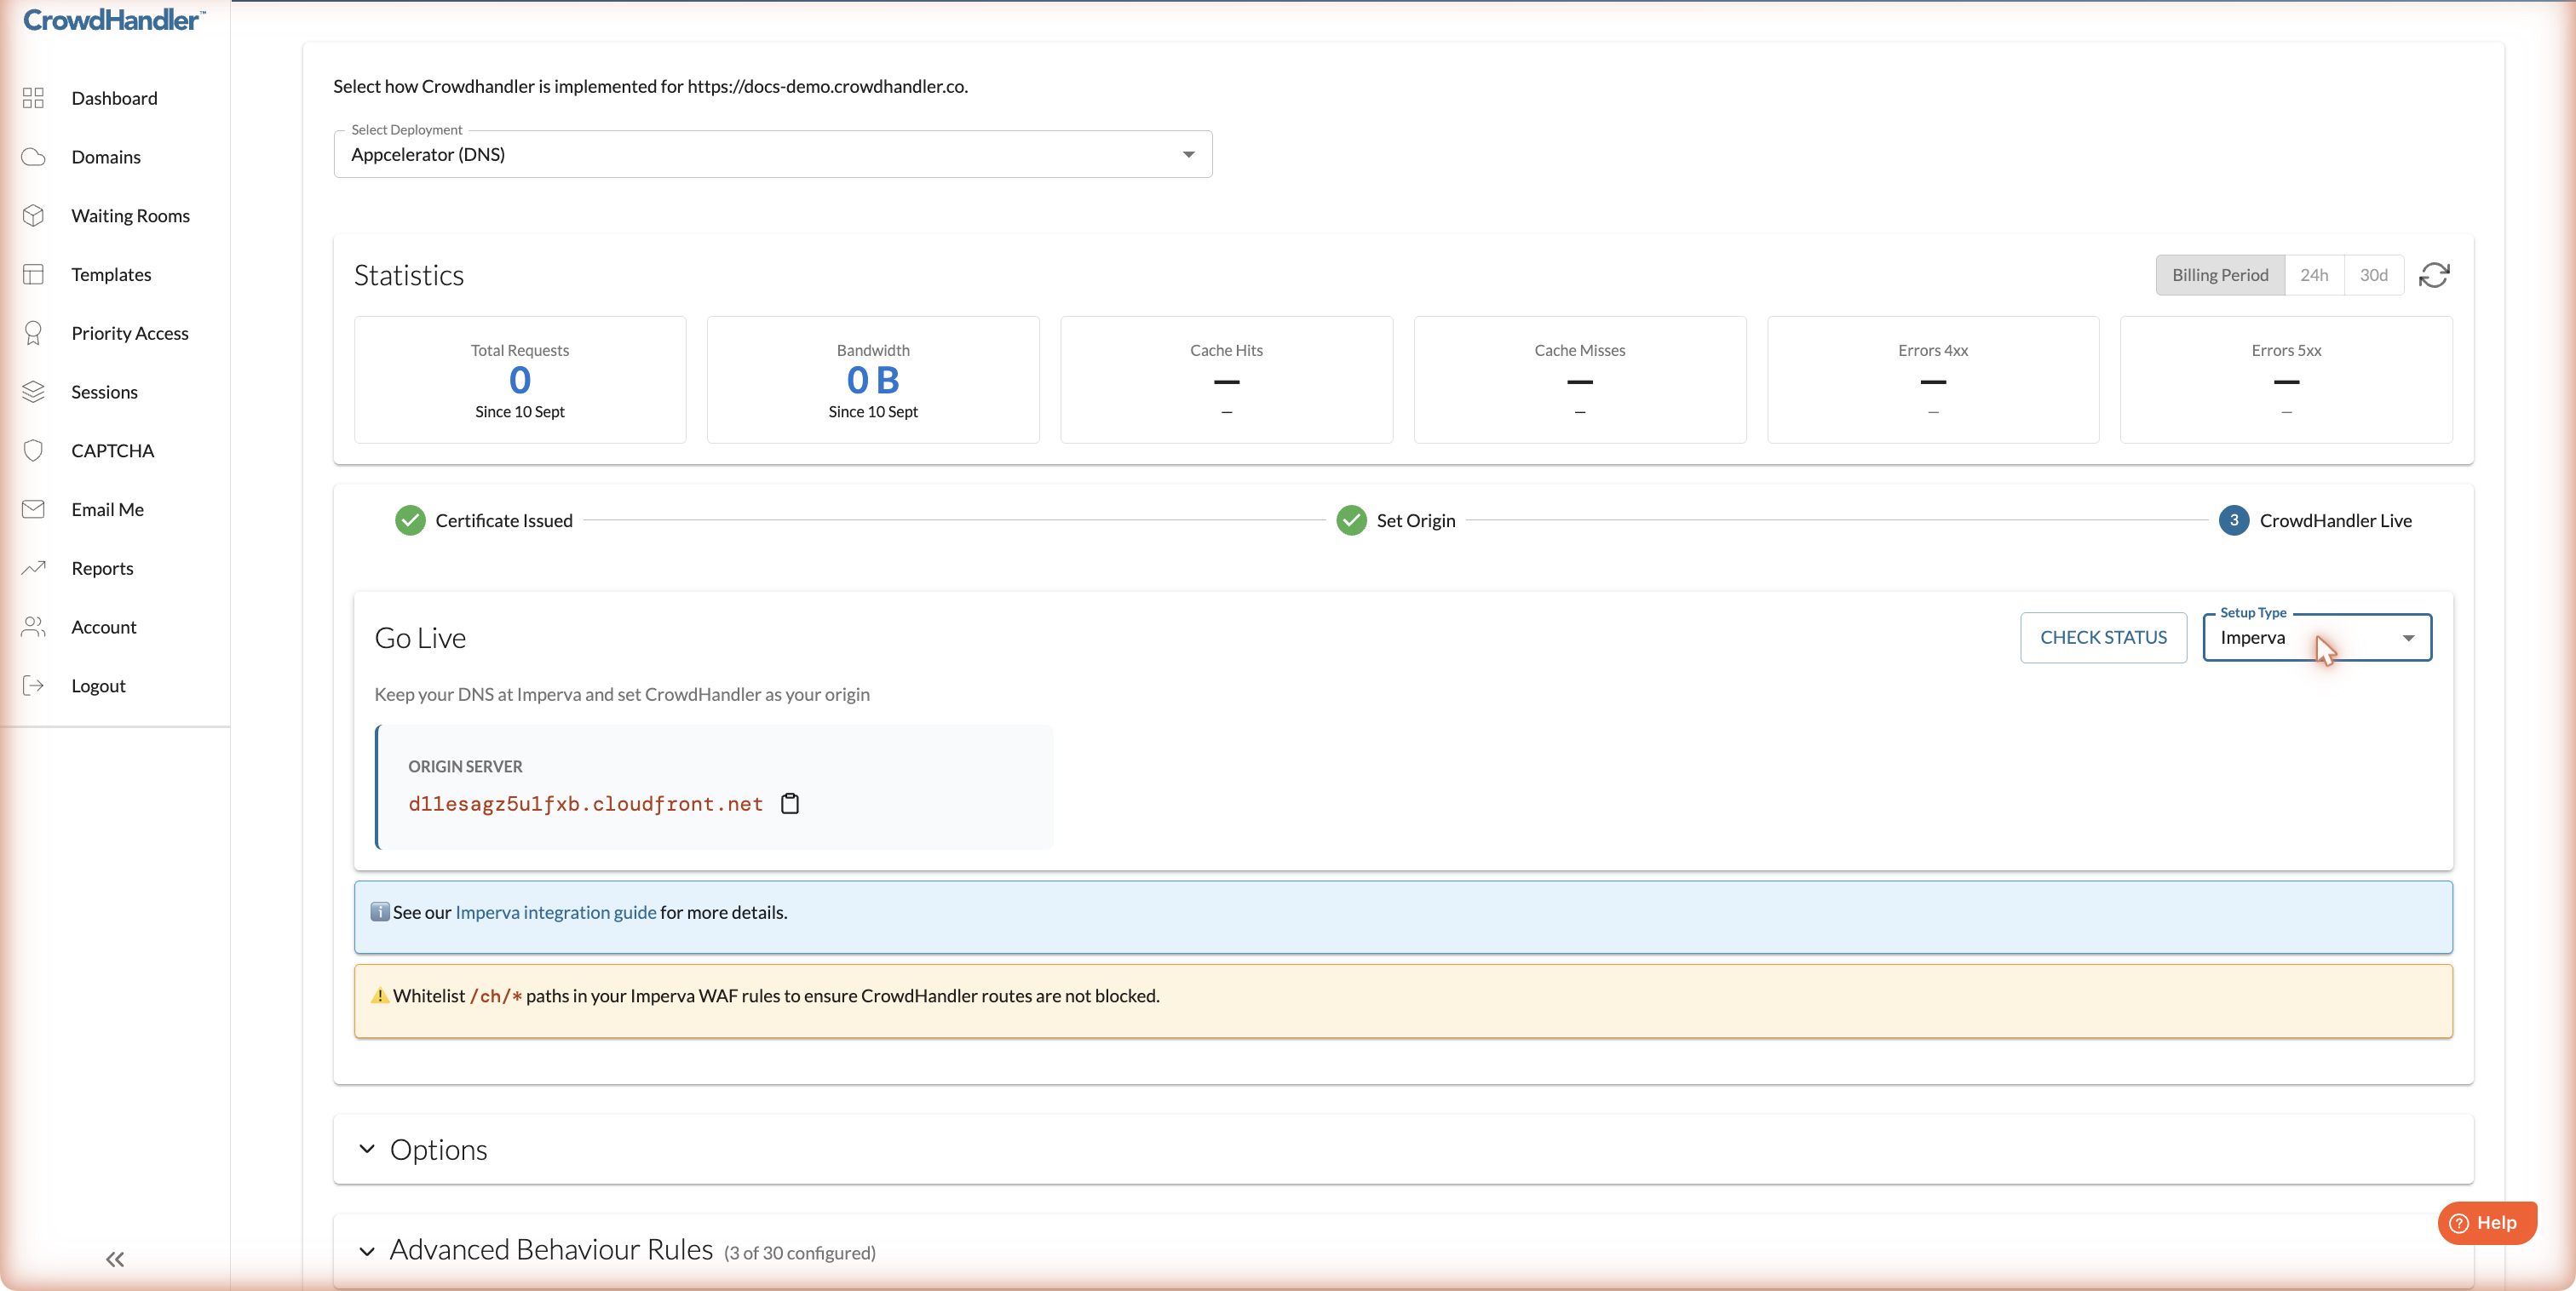
With either Cloudflare or Imperva in front of CrowdHandler, allow the /ch/* path in your WAF rules. CrowdHandler uses those paths for its own routes and blocking them will break the waiting room.
Options
Below the Go Live panel, expand Options.
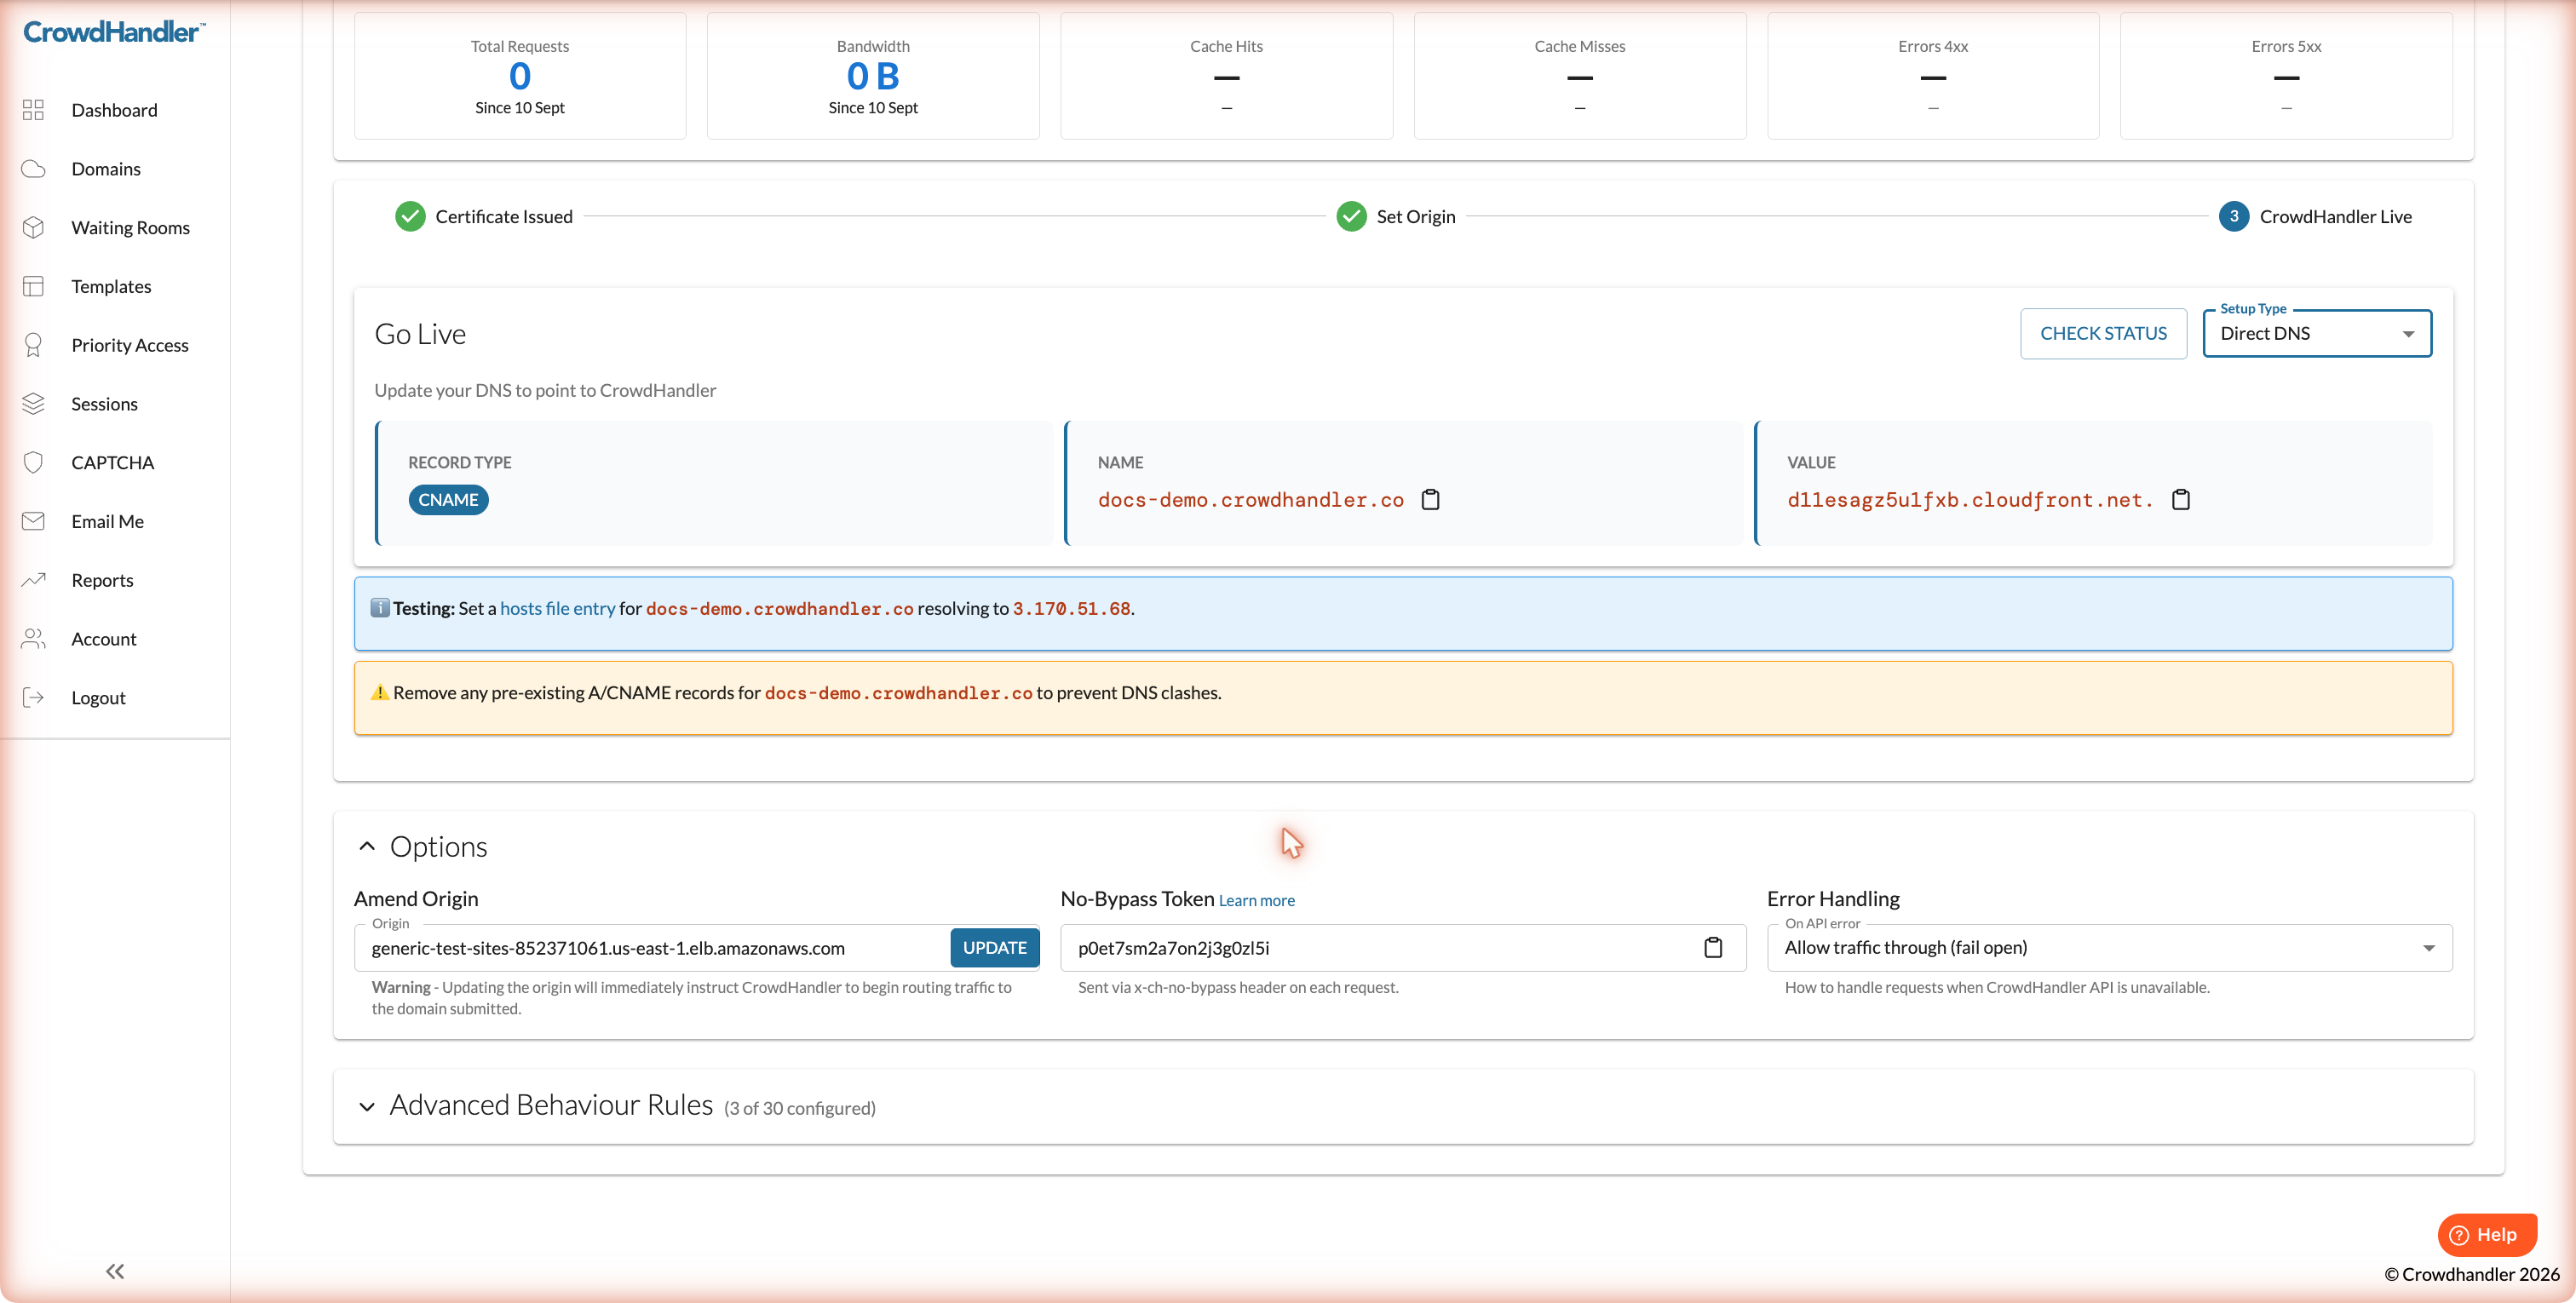
- Amend Origin changes where CrowdHandler sends traffic. The change takes effect immediately, so double-check the hostname.
- No-Bypass Token is a secret CrowdHandler sends to your origin on every request in the
x-ch-no-bypassheader. Check for it at your origin to reject traffic that didn't come through CrowdHandler. See Guarding against DNS bypass attempts. - Error Handling decides what happens if the CrowdHandler API can't be reached. Allow traffic through (fail open) is the default and lets visitors through to your site. Send to waiting room (fail safe) holds visitors in the waiting room instead. Changes take a few minutes to reach every edge location.
Next steps
Our getting started guide covers configuring and customising waiting rooms. Where it refers to the JavaScript integration, those steps don't apply to Appcelerator.
To control which paths are queued or cached, see Advanced Behaviour Rules (next article).