Step 2 - Associate EdgeWorker With Property
This step guides you through the process of editing the property associated with the domain that you would like to protect and associating the CrowdHandler EdgeWorker with it.
-
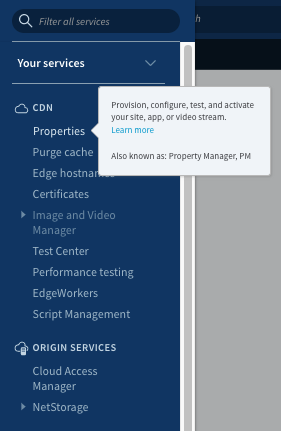
Open the side navigation and select properties.
-
Using the "Group" dropdown, select the group containing the property that you would like to install the CrowdHander integration on.
-
Select the Property Name that you would like to configure.
-
Select "New Version" on your chosen stage environment.
-
Add the following Property Variables.
Variable 1
Name - CROWDHANDLER_API_ENDPOINT
Value - api.crowdhandler.com
Security Settings - Hidden
Variable 2
Name - CROWDHANDLER_WR_ENDPOINT
Value - wait.crowdhandler.com
Security Settings - Hidden
Variable 3 (value can be found in the account → API control panel screen)
Name - CROWDHANDLER_PUBLIC_KEY
Value - yourpublickeyhere
Security Settings - Hidden
Variable 4 (value can be found in the account → API control panel screen)
Name - CROWDHANDLER_PRIVATE_KEY
Value - yourprivatekeyhere
Security Settings - Hidden
Variable 5
Name - DEFAULT_HOST
Value - %(AK_HOST)
Security Settings - Hidden
Variable 6
Name - CLIENT_IP
Value - %(AK_CLIENT_IP)
Security Settings - Hidden
-
Select "Add Rule"
-
Select "Blank Rule Template"
-
Name - CrowdHandler EdgeWorker
-
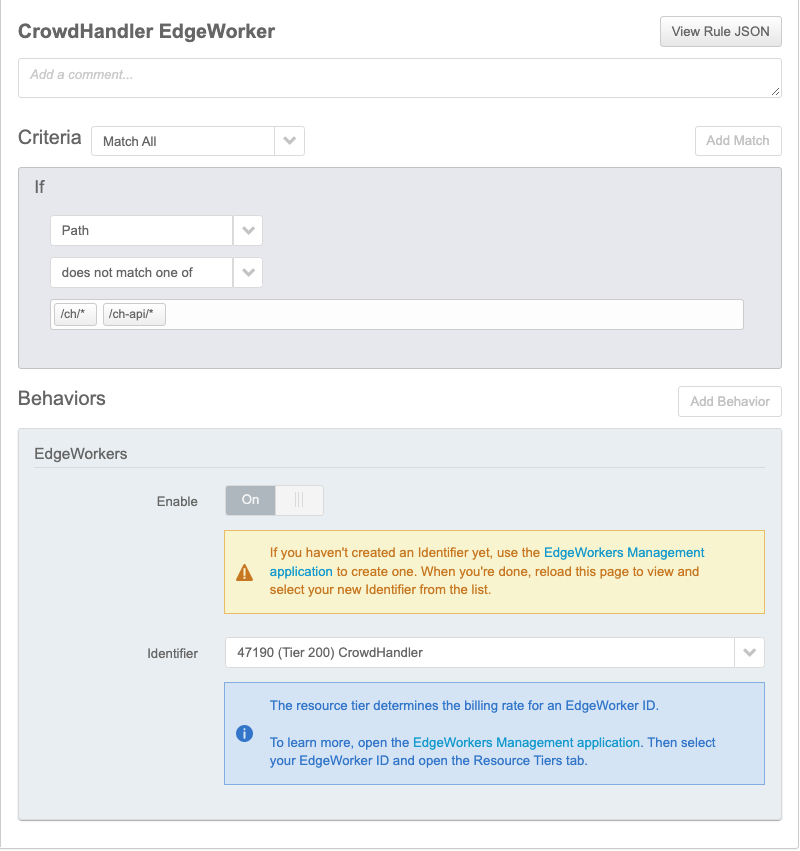
Configure the CrowdHandler EdgeWorker rule as follows then save.