Integración con Cloudflare: primeros pasos
Nuestra integración con Cloudflare utiliza la solución de código en el borde de Cloudflare, Cloudflare Workers, para ofrecerte un servicio de sala de espera que funciona directamente desde tu CDN sin que tengas que realizar ningún cambio en el código de tu aplicación ni en tus servidores web.
Introducción
En este artículo se explican los pasos necesarios para integrar CrowdHandler con Cloudflare.
- Pasos 1 y 2 te guiará a lo largo del proceso de instalación y configuración del worker.
- Pasos 3–4 te mostramos cómo activar la protección de CrowdHandler en las rutas que elijas.
- Pasos 5 y 6 Te ofrecemos enlaces a artículos que te ayudarán a configurar tus salas de espera a través del panel de control de CrowdHandler.
Si en algún momento, mientras sigues los pasos de la guía, te quedas atascado o tienes alguna duda, no dudes en ponerte en contacto con nosotros a través de nuestra página de asistencia.
Requisitos previos
- Una cuenta activa de CrowdHandler. Si aún no te has registrado, puedes hacerlo aquí.
- Una cuenta de Cloudflare.
- El dominio que deseas proteger debe configurarse como «Proxied» en Cloudflare. El modo «Solo DNS» no funcionará.
Nota: ¿Quieres proteger una página de WordPress o WooCommerce? Asegúrate de configurar
ORIGIN_TYPE = wordpressen el paso 2 de la guía.
Paso 1: Crear un Worker de Cloudflare
-
Inicia sesión en tu cuenta de Cloudflare.
-
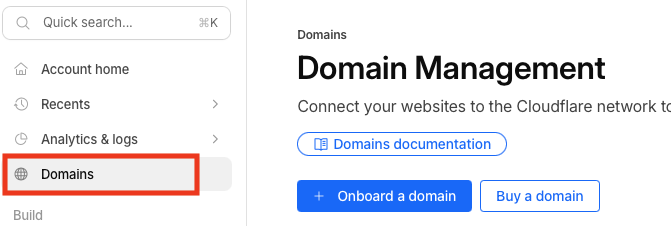
Selecciona «Dominios» en el menú de navegación de la izquierda.
-
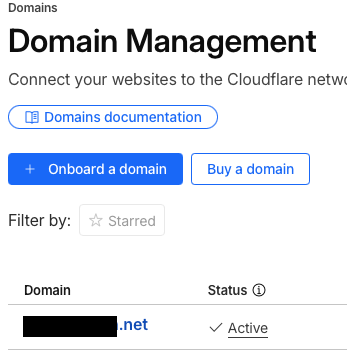
Selecciona uno de tus dominios:
-
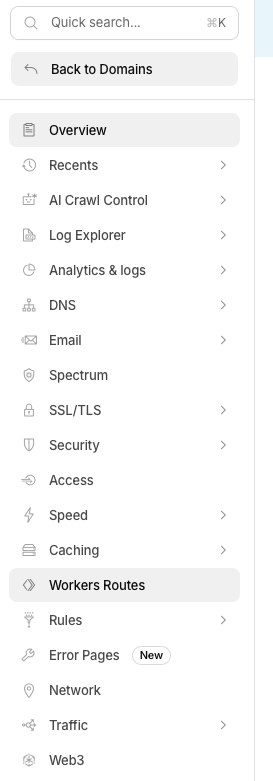
Selecciona el menú «Rutas de los trabajadores » en el panel de navegación de la izquierda.
-
En la parte superior derecha de la página hay un botón que dice«Gestionar trabajadores». Haz clic en él y pasa al siguiente paso.

-
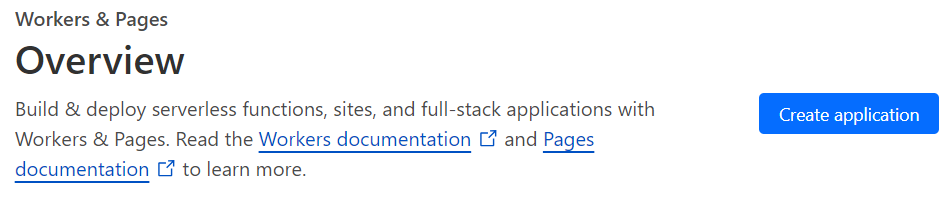
En la esquina superior derecha, haz clic en el botón «Crear aplicación».
-
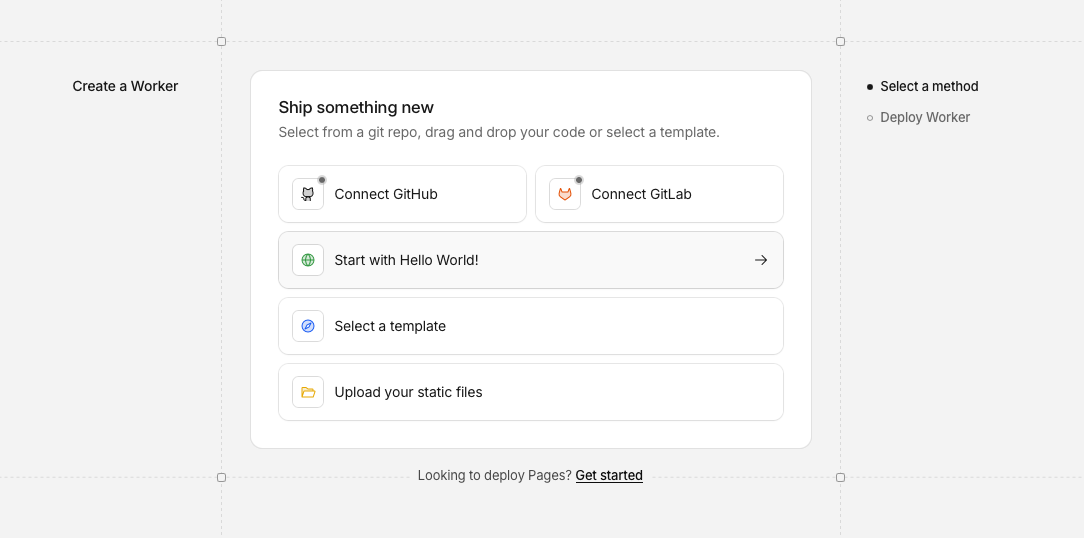
En esta página, selecciona «¡Empieza con Hello World!».
-
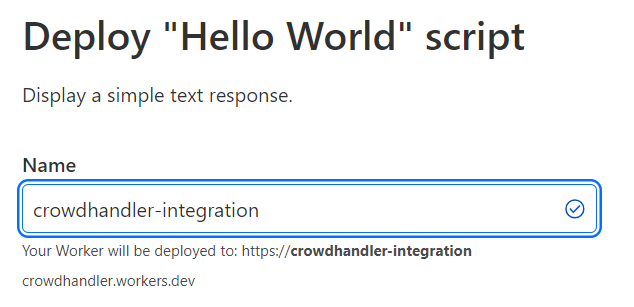
Ahora puedes configurar el nombre de tu worker; configúralo como «crowdhandler-integration».
Nota: Todavía no puedes modificar el código. Se trata solo de una configuración básica del worker.
-
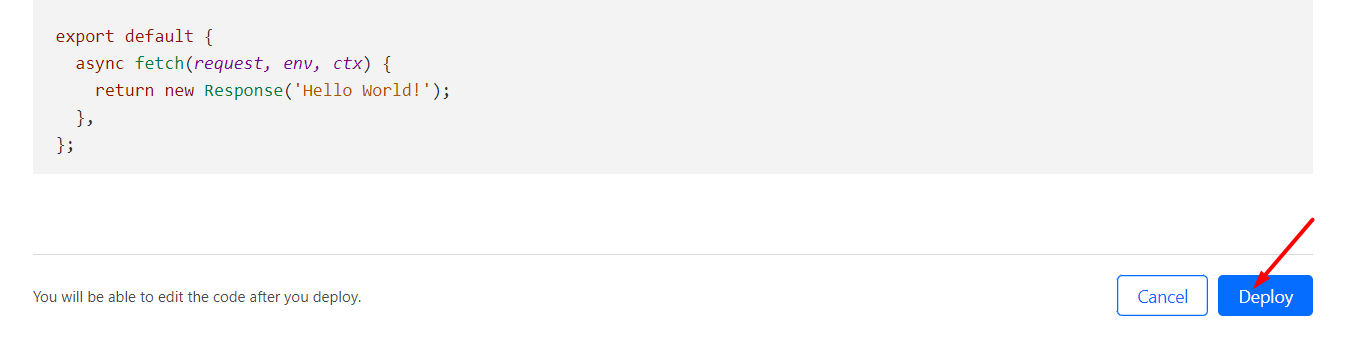
Continúa con la creación del worker haciendo clic en«Implementar».
-
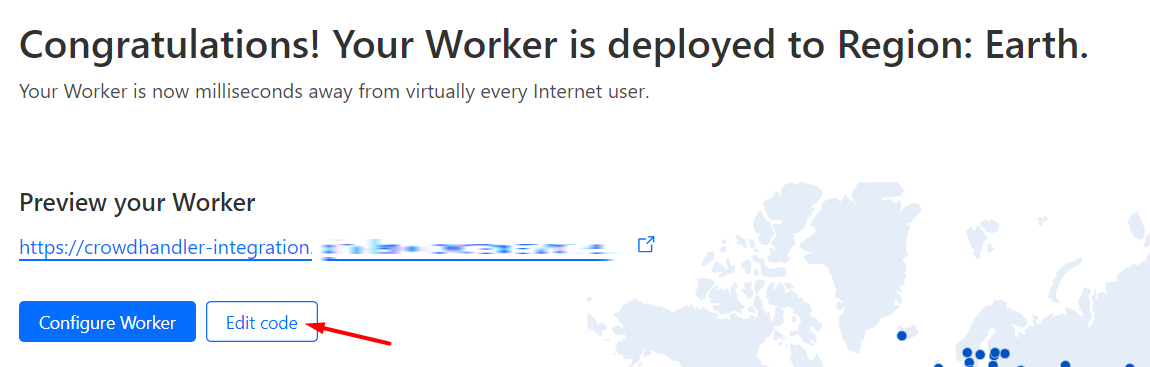
Ahora, vamos a aplicar la integración del código pulsando «Editar código».
-
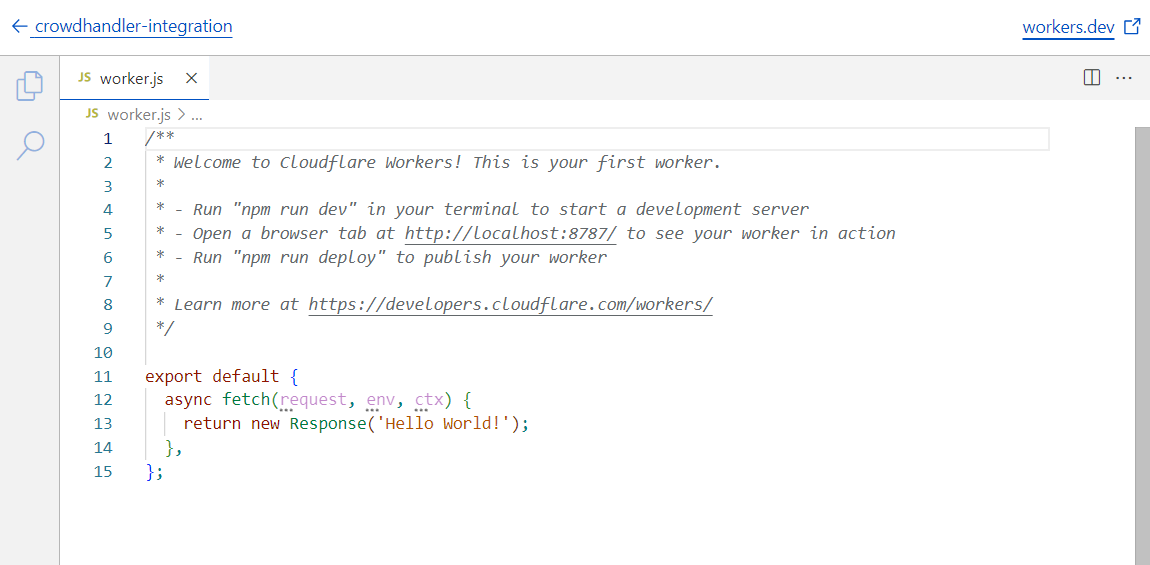
Podrás ver el código predeterminado de «Hello World».
-
Copia nuestro código de integración de GitHub y pégalo en el script.
-
Haz clic en el botón«Implementar».

Paso 2: Configurar las variables del trabajador
-
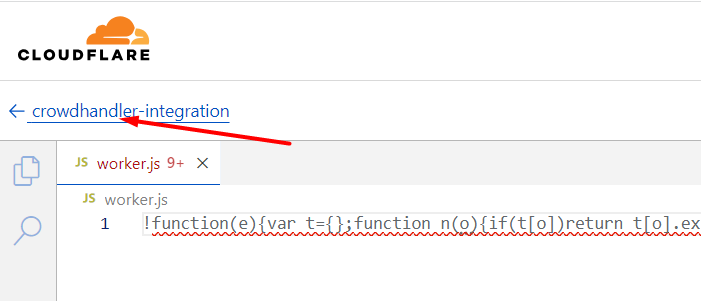
Pulsa el botón «Atrás» en la página de edición del script.
-
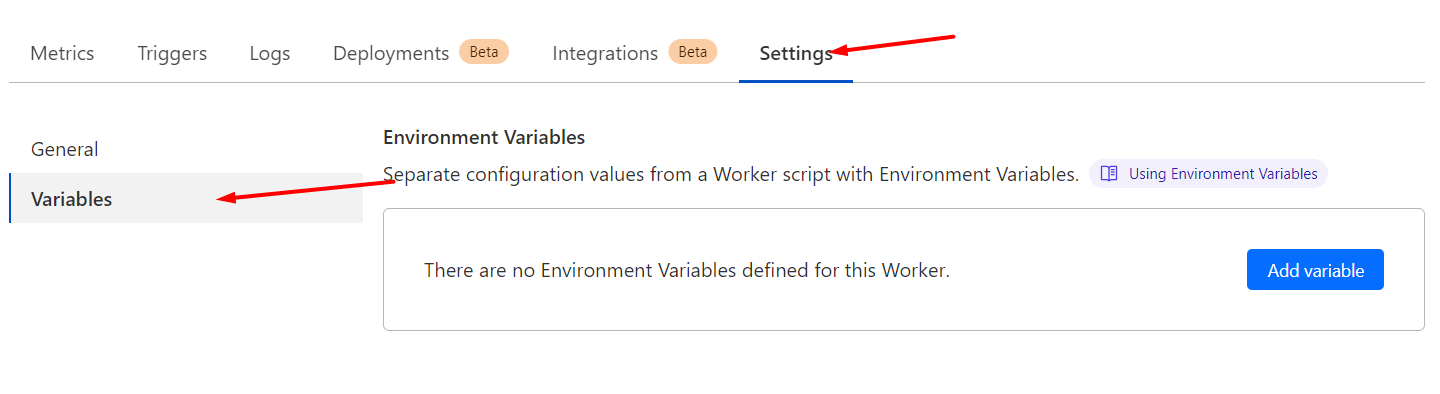
Ve a Configuración → Variables.
-
Añade las siguientes variables como texto sin formato y, a continuación, haz clic en «Guardar e implementar».
API_ENDPOINT= https://api.crowdhandler.com/v1API_KEY= TU_CLAVE_PÚBLICA_AQUÍ (Se encuentra en la sección «Cuenta → API» del panel de control de administración de CrowdHandler.)- (Opcional)
WHITELABEL= false (por defecto) | verdadero - (Opcional)
TIPO_DE_ORIGEN= WordPress (configura esta variable opcional si estás protegiendo una página web de WordPress o WooCommerce) - (Opcional)
NO_BYPASS= TU_TOKEN_ALEATORIO_AQUÍ - (Opcional)
FAIL_TRUST= false | verdadero (por defecto) - (Opcional)
SAFETY_NET_SLUG= TU_SALA_DE_ESPERA_AQUÍ - (Opcional)
COOKIE_DOMAIN= TU_DOMINIO_DE_COOKIES_AQUÍ - (Opcional)
IP_HEADER= TU_ENCABECADO_PERSONALIZADO_AQUÍ
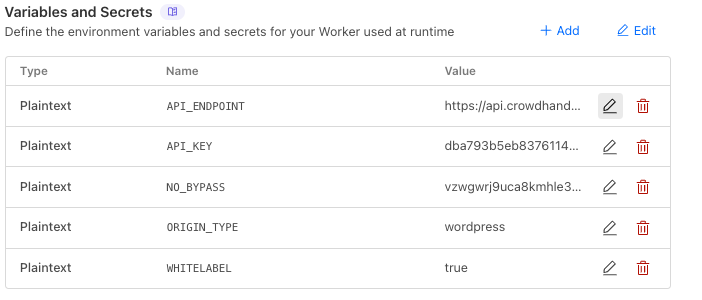
VARIABLES OPCIONALES
WHITELABEL(por defecto false) — Por defecto, los usuarios se pondrán en cola en el dominio wait.crowdhandler.com de CrowdHandler. SiWHITELABELSi se establece en «true», los usuarios se pondrán en cola en el dominio que protege CrowdHandler. Por ejemplo, si CrowdHandler se ha configurado para proteger www.example.com, los usuarios se pondrán en cola en el www.example.com/ch/ ruta. No es necesario que la ruta /ch/ exista en tu aplicación. Más información sobre Salas de espera de marca blanca aquí.
TIPO_DE_ORIGEN— Establecer el valor en WordPress si estás protegiendo un origen de WordPress o WooCommerce. Esto excluirá de las comprobaciones de la API de CrowdHandler las solicitudes de URL que coincidan con el siguiente patrón de expresión regular:/(w[cp][-_](?![-_])(?!order_).*|xmlrpc\.php|readme\.html|license\.txt|trackback|feed(?:\/.*)?|comments\/feed(?:\/.*)?)(\?.*)?/
NO_BYPASS— ElNO_BYPASSEl valor se enviará a tu origen como valor del encabezado «x-ch-no-bypass». Puedes comprobar la presencia de este encabezado en tu aplicación para verificar que la solicitud ha pasado por CrowdHandler. Encontrarás ejemplos de implementación en la sección «Ejemplos de integración» de este artículo.
FAIL_TRUST(por defecto verdadero) — Por defecto, se considerará de confianza a los usuarios que no se identifiquen mediante la API de CrowdHandler. Si se configura en false, los usuarios que no se registren a través de la API de CrowdHandler serán enviados a una sala de espera de seguridad hasta que CrowdHandler pueda decidir qué hacer con ellos. Más información sobre «Trust on Fail» aquí.
SAFETY_NET_SLUG— SiSAFETY_NET_SLUGse define yFAIL_TRUSTestá configurado en false, esta sala de espera se utilizará como sala de seguridad. Si no defines unaSAFETY_NET_SLUGvalor yFAIL_TRUSTestá configurado en false, se utilizará una plantilla genérica de sala de espera como sala de seguridad. Puedes encontrar el identificador de tu sala de espera en el panel de control de CrowdHandler, en el campo «URL» de la configuración de tu sala.
COOKIE_DOMAIN— Por defecto, la cookie de CrowdHandler es de solo host. ConfiguraCOOKIE_DOMAINa un dominio principal (por ejemplo, example.com) para compartirlo entre subdominios; esto resulta útil a la hora de poner en cola en www.example.com y la validación de sesiones en api.example.com. Debe ser un dominio de nivel superior respecto al nombre de host del trabajador; se ignoran los valores no válidos.
IP_HEADER— De forma predeterminada, el worker lee la IP del cliente a partir del encabezado «cf-connecting-ip» de Cloudflare. Si tu tráfico llega a Cloudflare a través de un proxy de nivel superior (por ejemplo, zScaler o Imperva) que inserta la IP original del cliente en un encabezado diferente, configuraIP_HEADERa ese nombre de encabezado (por ejemplo, «x-forwarded-for») para obtener la dirección IP a partir de ahí. En el caso de los encabezados con varios valores, se utiliza la entrada situada más a la izquierda. Si el encabezado configurado no existe, está vacío o se produce algún error durante el análisis, el worker recurre de forma segura a «cf-connecting-ip», por lo que las implementaciones existentes no se ven afectadas cuando esta variable no está definida.Importante: activa esta opción únicamente cuando tengas la certeza de que tu tráfico pasa por un proxy de nivel superior de confianza que tú mismo controles.
Paso 3: Configurar rutas protegidas
-
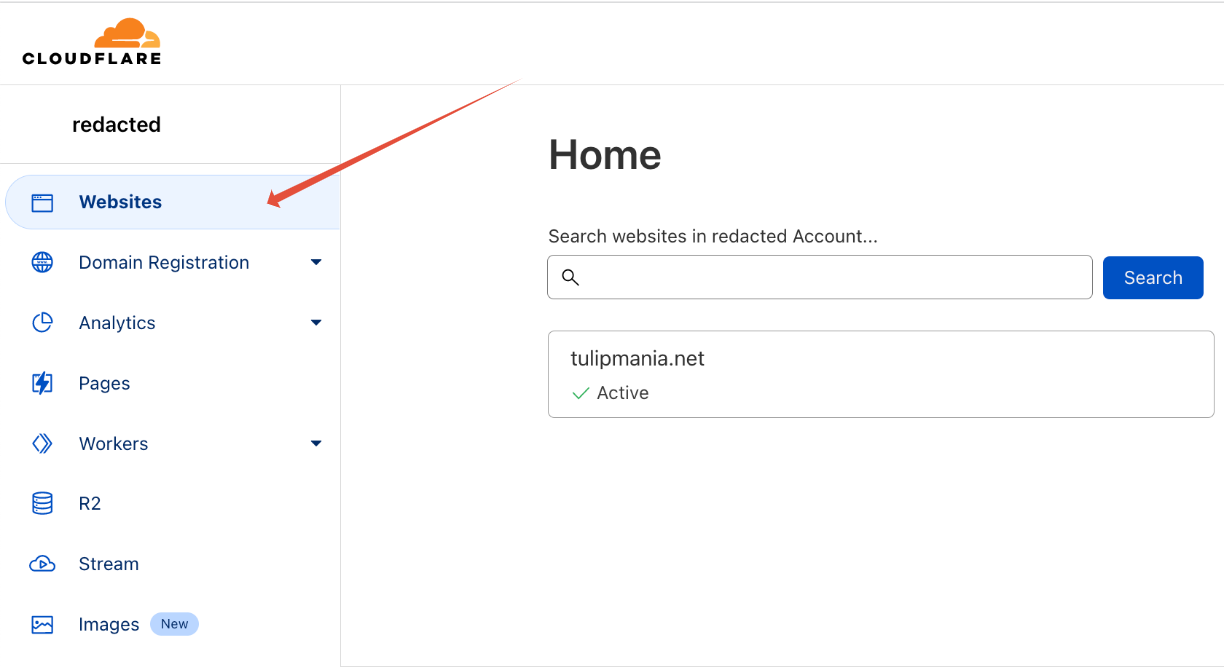
En el menú de navegación de la izquierda, haz clic en «Sitios web» y, a continuación, haz clic en el dominio en el que vas a integrar CrowdHandler.
-
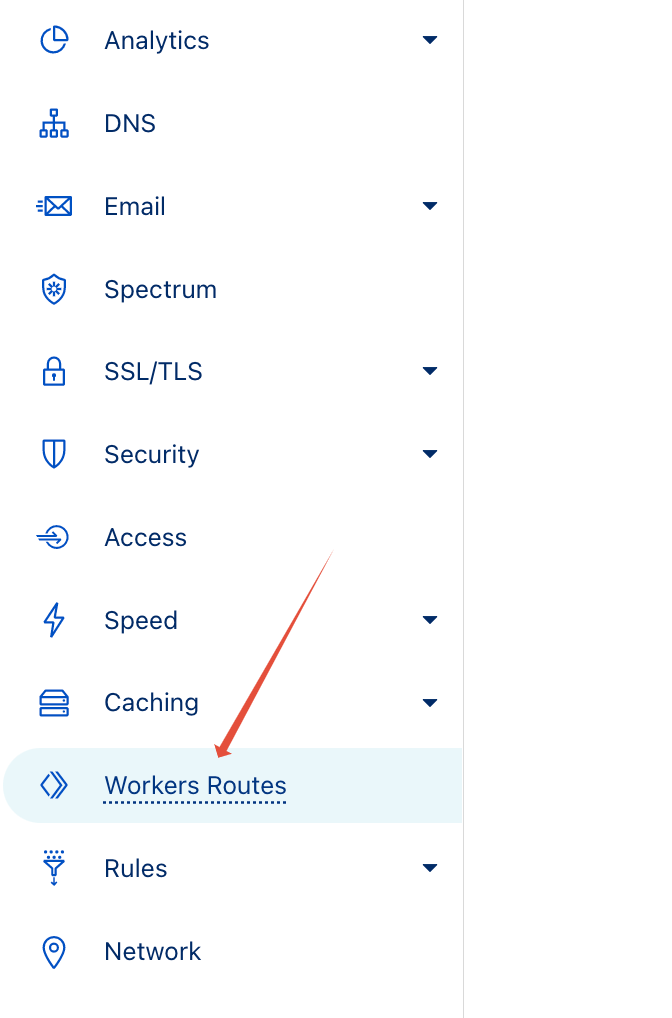
Vuelve a utilizar el menú de navegación de la izquierda y selecciona «Rutas de los trabajadores».
-
Añade la ruta que te gustaría proteger.
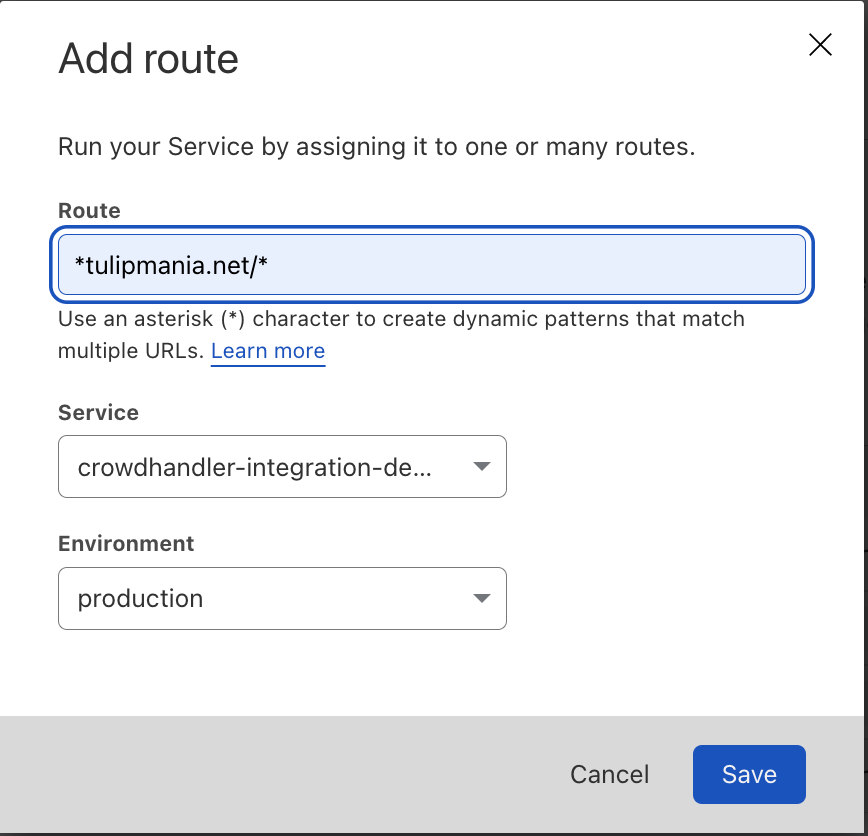
El patrón anterior activará el trabajador CrowdHandler para todas las rutas de tu sitio web, salvo aquellas que hayas excluido en el siguiente paso.
IMPORTANTE
Si decides proteger una ruta más concreta, por ejemplo
*tulipmania.net/enroll-now, Y has establecido la variable opcionalWHITELABELSi es así, deberías añadir una ruta adicional que cubra*tulipmania.net/ch*. Sin esta ruta, el worker de Cloudflare no se activará para mostrar la sala de espera.
Paso 4: Excluir rutas
-
Excluye las rutas que no deben contar con la protección de CrowdHandler añadiendo rutas adicionales y seleccionando «Ninguna» en el menú desplegable de trabajadores.
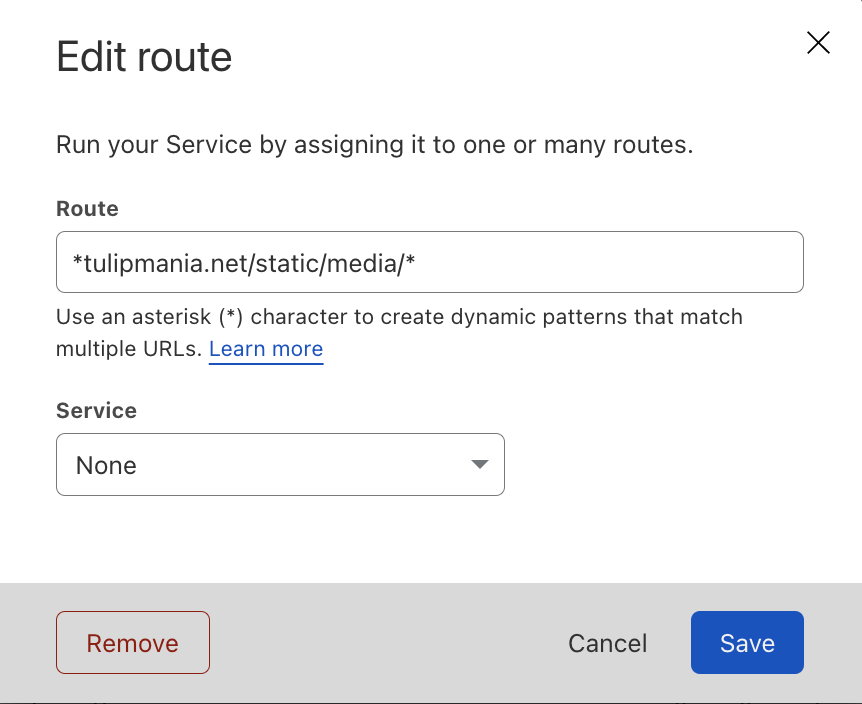
Por defecto, CrowdHandler no intentará poner en cola automáticamente las rutas con las siguientes extensiones de archivo:
avi, css, csv, eot, gif, ico, jpg, js, json, map, mov, mp4, mpeg, mpg, ogg, ogv, ott, pdf, png, svg, ttf, webmanifest, wmv, woff, woff2, xmlAlgunos ejemplos de rutas que quizá quieras considerar excluir son:
- Rutas utilizadas para almacenar recursos estáticos y archivos multimedia, p. ej., /images/*
- URL de devolución de llamada generadas por proveedores de pago externos.
- Formato JSON y fuentes RSS.
Paso 5: Finaliza la configuración
CrowdHandler está integrado con tu cuenta de Cloudflare, y ahora te toca a ti personalizar la configuración de CrowdHandler a través de la consola de administración de CrowdHandler. A continuación te ofrecemos algunos artículos de ayuda recomendados que explican los conceptos básicos:
- Primeros pasos (Puedes saltarte las partes sobre la instalación de la integración de JavaScript).
- Salas de espera
- Configuración del dominio
Paso 6 (recomendado): Desactivar la limitación de rate de Cloudflare Workers
El plan gratuito de Cloudflare Workers está sujeto a un límite diario de 100 000 solicitudes, que se restablece a medianoche (UTC). Si este límite te parece demasiado bajo para tu tráfico, te recomendamos el plan de pago de Workers, que elimina el límite diario.
Paso 7: Realización de una prueba de integración sencilla
Una vez completados los pasos de configuración, te recomendamos que realices una prueba de funcionamiento de tu configuración tal y como se describe en la guía que encontrarás aquí: ¿Cómo puedo probar la sala de espera?