Intégration .NET - Guide de démarrage rapide
Ce guide a pour objectif de vous expliquer comment réaliser une intégration de base de CrowdHandler .NET dans votre application ASP.NET Core ou ASP.NET MVC 5.
Pour davantage de personnalisation et des configurations avancées, veuillez vous reporter au dépôt GitHub du projet ou à la documentation NuGet.
1.) Ajoutez une référence à votre projet.
Le plus simple est d'utiliser NuGet. Recherchez le Crowdhandler.MVCSDK dans le gestionnaire de paquets NuGet, ou bien via l'interface de ligne de commande dotnet.
dotnet add package Crowdhandler.MVCSDK
Sous .NET Framework, utilisez plutôt la console du gestionnaire de paquets.
Install-Package Crowdhandler.MVCSDK
Ce package prend en charge ASP.NET Core 6, 8, 9 et 10, ainsi qu'ASP.NET MVC 5 sur .NET Framework 4.7.2 et versions ultérieures.
2.) Injecter la configuration de CrowdHandler.
* Les clés publiques et privées se trouvent dans la section « Compte → API » du panneau de configuration de CrowdHandler.
ASP.NET Core via appsettings.json
{
  "Crowdhandler": {
    "PublicApiKey": "YOUR_PUBLIC_KEY",
    "PrivateApiKey": "YOUR_PRIVATE_KEY"
  }
}
Utilisez des secrets utilisateur ou des variables d'environnement (Crowdhandler__PrivateApiKey) plutôt que d'enregistrer la clé privée.
ASP.NET MVC 5 via le fichier web.config
<appSettings>
    <add key="CROWDHANDLER_PUBLIC_KEY" value="YOUR_PUBLIC_KEY"/>
    <add key="CROWDHANDLER_PRIVATE_KEY" value="YOUR_PRIVATE_KEY"/>
</appSettings>
* Vous trouverez la liste complète des paramètres configurables et de leurs valeurs par défaut dans le guide de configuration.
3.) Appliquez CrowdHandler à vos requêtes.
ASP.NET Core
Enregistrez le middleware lors du démarrage de votre application. Comme il valide chaque requête, placez-le avant les fichiers statiques, le routage et les points de terminaison.
Program.cs
using Crowdhandler.MVCSDK.AspNetCore;

var builder = WebApplication.CreateBuilder(args);
builder.Services.AddCrowdhandler(builder.Configuration.GetSection("Crowdhandler"));

var app = builder.Build();

app.UseCrowdhandler();
app.UseStaticFiles();
app.MapControllers();
app.Run();
Pour protéger uniquement certaines actions spécifiques des contrôleurs, utilisez l'attribut « filter » plutôt que le middleware.
ExempleTicketingController.cs
using Crowdhandler.MVCSDK;

namespace MyTicketingApp.Controllers
{
    public class TicketingController : Controller
    {
        [CrowdhandlerFilter]
        public IActionResult Index()
        {
            return View();
        }
    }
}
ASP.NET MVC 5
Appliquez l'attribut « filter » aux actions du contrôleur que vous souhaitez protéger.
ExempleTicketingController.cs
using Crowdhandler.MVCSDK;

namespace MyTicketingApp.Controllers
{
    public class TicketingController : Controller
    {
        [CrowdhandlerFilter]
        public ActionResult Index()
        {
            return View();
        }
    }
}
Pour protéger chaque action, enregistrez-la globalement dans FilterConfig.cs.
filters.Add(new CrowdhandlerFilterAttribute());
Exclure des URL
Les ressources statiques (par extension de fichier) sont exclues de la file d'attente par défaut. Définissez des modèles d'URL supplémentaires à ignorer via le paramètre « Exclusions », une expression régulière contenant les modèles que vous ne souhaitez pas voir pris en compte pour la file d'attente. Elle peut être indiquée sous la forme appsettings.json ou web.config (CROWDHANDLER_EXCLUSIONS_REGEX), ou dans l'attribut « filter » comme indiqué ci-dessous.
Voici quelques schémas courants qu'il faut ignorer :
- Chemins d'accès utilisés pour stocker les ressources statiques et les fichiers multimédias, par exemple /static-media/*
- URL de rappel générées par des prestataires de paiement tiers.
- Flux JSON et RSS.
[CrowdhandlerFilter(Exclusions = @"^(/contact-us.*)|(/api/.*)|(^[^?]*\.(css|js|png|jpg|gif|svg|ico|woff2?)(\?.*)?$)")]
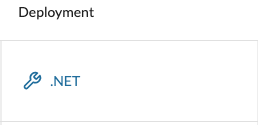
4.) Modifiez le type d'intégration en « .NET » dans le panneau de configuration de CrowdHandler.
La sélection du déploiement peut s'effectuer depuis l'écran des domaines.
5.) Et maintenant ?
Une fois que vous aurez suivi les étapes d'intégration .NET, nous vous recommandons de consulter notre guide de démarrage, qui vous aidera à vous familiariser avec la création et la configuration des salles d'attente depuis le panneau de configuration de CrowdHandler.