Intégration de Cloudflare - Pour commencer
Notre intégration Cloudflare utilise la solution de code en périphérie de Cloudflare, Cloudflare Workers, pour vous offrir un service de salle d'attente qui fonctionne directement depuis votre CDN, sans que vous ayez à apporter la moindre modification au code de votre application ou à vos serveurs web.
Introduction
Cet article vous guidera à travers les étapes nécessaires à l'intégration de CrowdHandler avec Cloudflare.
- Étapes 1 et 2 vous guidera tout au long de l'installation et de la configuration du worker.
- Étapes 3 et 4 vous montrer comment activer la protection CrowdHandler sur les routes de votre choix.
- Étapes 5 et 6 vous propose des liens vers des articles qui vous aideront à configurer vos salles d'attente via le panneau de configuration de CrowdHandler.
Si, à un moment ou à un autre de votre lecture de ce guide, vous rencontrez des difficultés ou avez des questions, n'hésitez pas à nous contacter via notre site d'assistance.
Conditions préalables
- Un compte CrowdHandler actif. Si vous n'êtes pas encore inscrit, vous pouvez le faire ici.
- Un compte Cloudflare.
- Le domaine que vous souhaitez protéger doit être configuré en mode « Proxied » dans Cloudflare. Le mode DNS uniquement ne fonctionnera pas.
Remarque : Vous souhaitez sécuriser un site WordPress ou WooCommerce ? Veillez à configurer
ORIGIN_TYPE = wordpressà l'étape 2 du guide.
Étape 1 : Créer un Worker Cloudflare
-
Connectez-vous à votre compte Cloudflare.
-
Sélectionnez « Domaines » dans le menu de navigation de gauche.
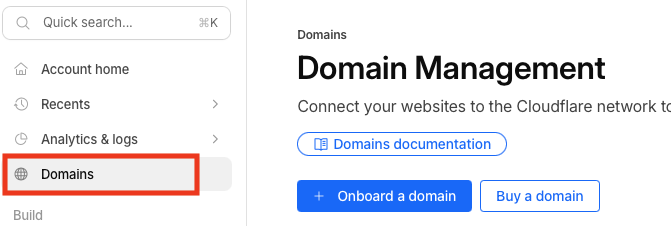
-
Sélectionnez l'un de vos domaines :
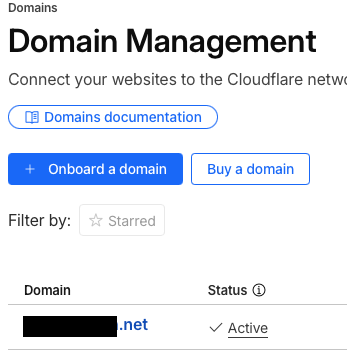
-
Sélectionnez le menu « Itinéraires des employés » dans le menu de navigation de gauche.
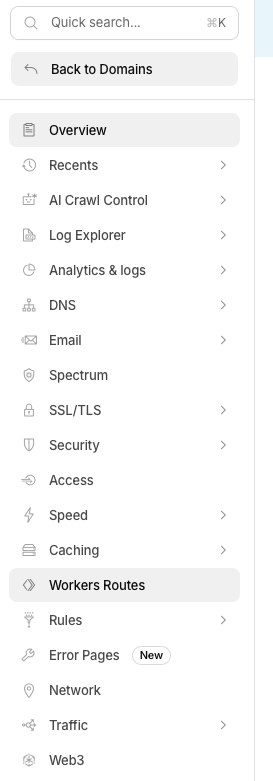
-
En haut à droite de la page se trouve un bouton intitulé «Gérer les travailleurs ». Cliquez dessus pour passer à l'étape suivante.

-
En haut à droite, cliquez sur le bouton «Créer une application ».
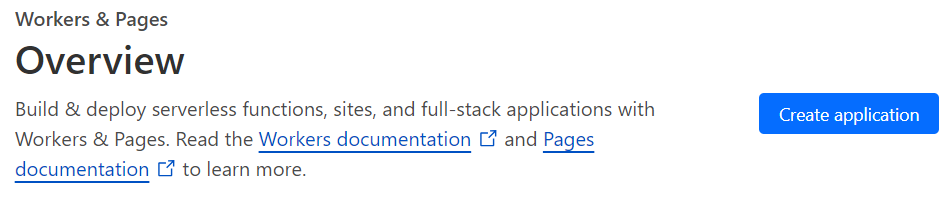
-
Sur cette page, sélectionnez «Commencer par Hello World ! ».
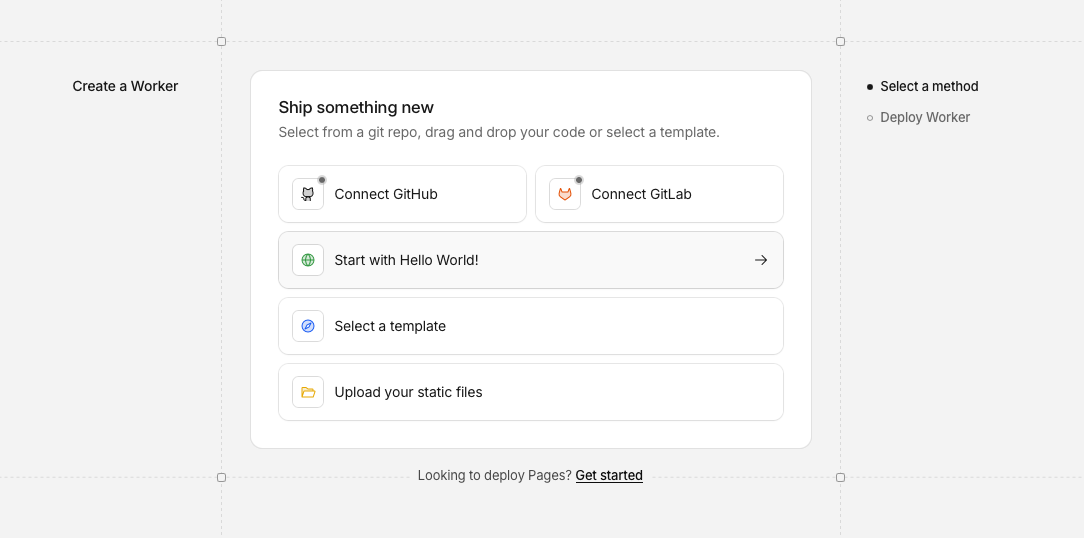
-
Vous pouvez désormais définir le nom de votre worker ; attribuez-lui le nom « crowdhandler-integration ».
Remarque : vous ne pouvez pas encore modifier le code. Il s'agit simplement d'une configuration de base du worker.
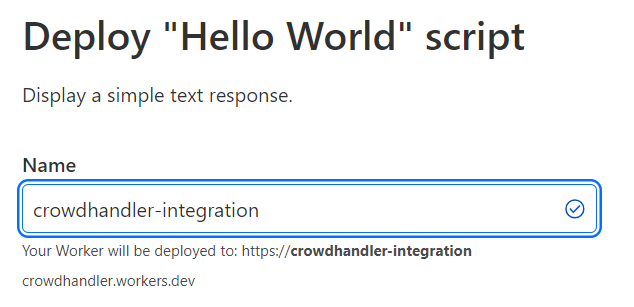
-
Passez à la création du worker en cliquant sur «Déployer ».
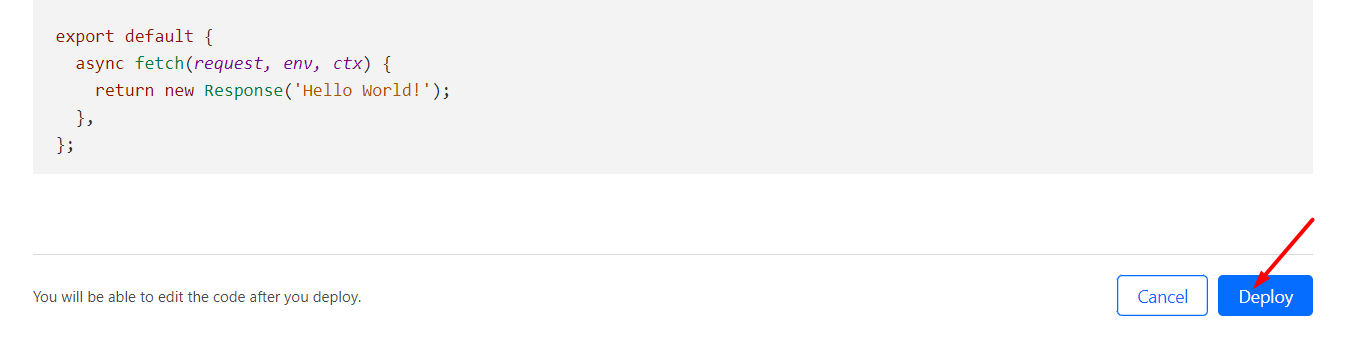
-
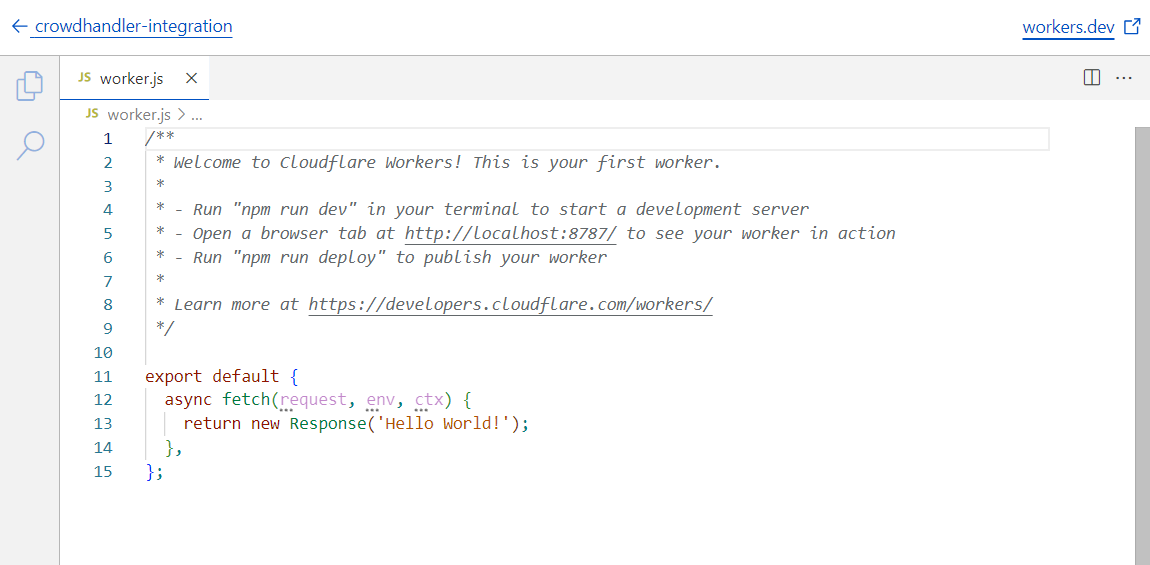
Maintenant, appliquons l'intégration du code en cliquant sur «Modifier le code ».
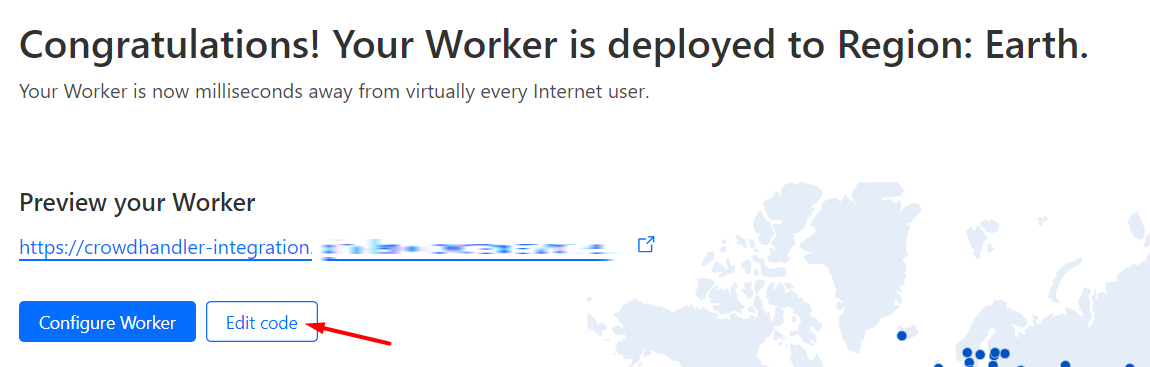
-
Vous pourrez voir le code « Hello World » par défaut.
-
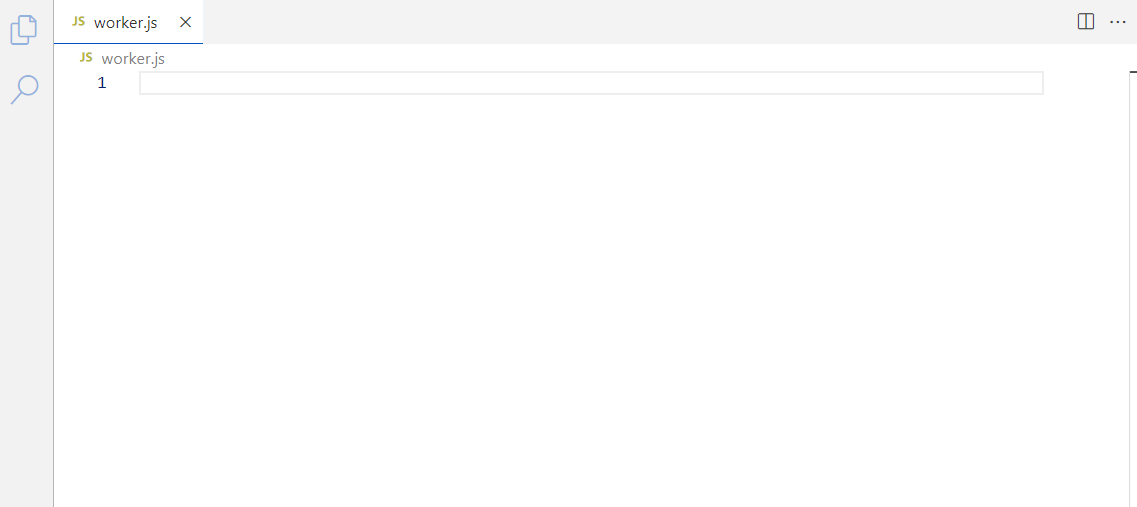
Copiez notre code d'intégration depuis GitHub et collez-le dans le script.
-
Cliquez sur le bouton «Déployer ».

Étape 2 : Configurer les variables du worker
-
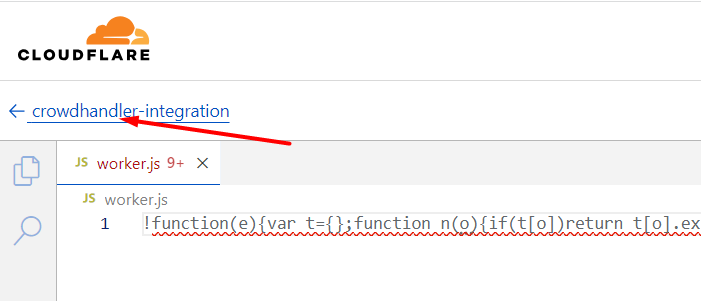
Cliquez sur le bouton « Retour » sur la page d'édition du script.
-
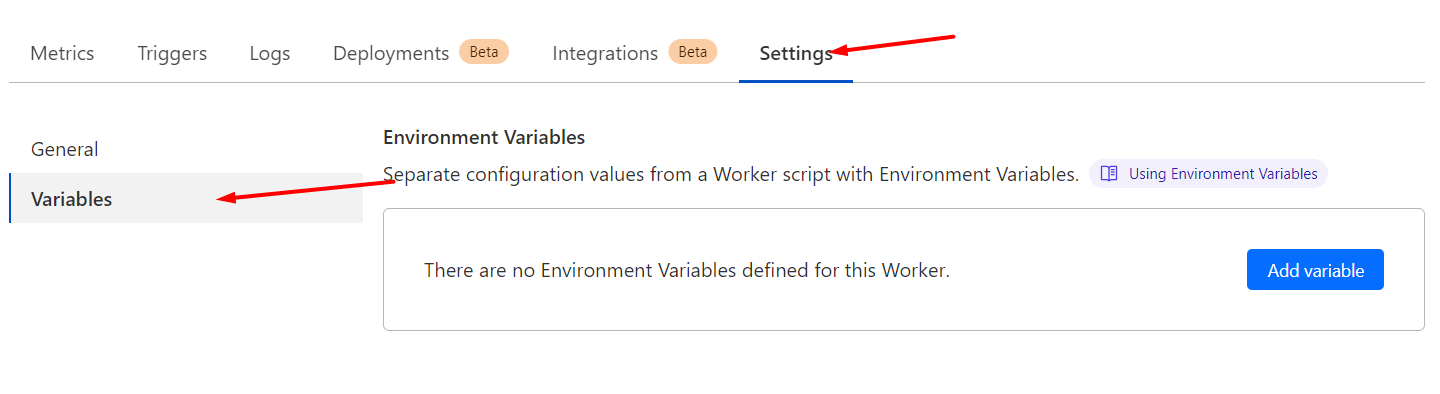
Accédez à Paramètres → Variables.
-
Ajoutez les variables suivantes sous forme de texte brut, puis cliquez sur « Enregistrer et déployer ».
API_ENDPOINT= https://api.crowdhandler.com/v1API_KEY= VOTRE_CLÉ_PUBLIQUE_ICI (Vous trouverez cette option dans la section Compte → API du panneau d'administration de CrowdHandler.)- (Facultatif)
WHITELABEL= false (par défaut) | vrai - (Facultatif)
TYPE_D'ORIGINE= WordPress (définissez cette variable facultative si vous protégez un site WordPress ou WooCommerce) - (Facultatif)
NO_BYPASS= VOTRE_JETON_ALÉATOIRE_ICI - (Facultatif)
FAIL_TRUST= false | vrai (par défaut) - (Facultatif)
SAFETY_NET_SLUG= VOTRE_SALLE_D'ATTENTE_ICI - (Facultatif)
COOKIE_DOMAIN= VOTRE_DOMAINE_DE_COOKIES_ICI - (Facultatif)
IP_HEADER= VOTRE_EN-TÊTE_PERSONNALISÉ_ICI
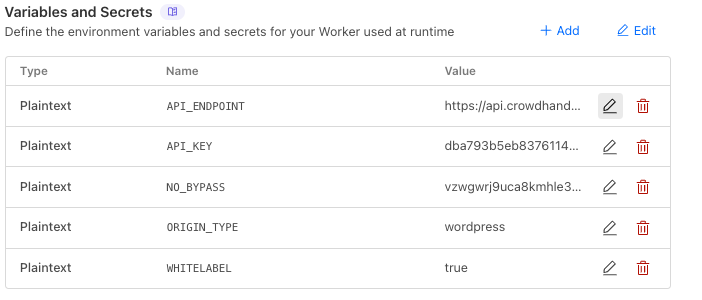
VARIABLES FACULTATIVES
WHITELABEL(par défaut false) — Par défaut, les utilisateurs seront placés en file d'attente sur le domaine wait.crowdhandler.com de CrowdHandler. SiWHITELABELSi cette option est définie sur « true », les utilisateurs seront mis en file d'attente sur le domaine protégé par CrowdHandler. Par exemple, si CrowdHandler a été configuré pour protéger www.example.com, les utilisateurs seront placés en file d'attente sur le www.example.com/ch/ chemin d'accès. La route /ch/ n'a pas besoin d'exister dans votre application. Pour en savoir plus, consultez Salles d'attente en marque blanche ici.
TYPE_D'ORIGINE— Définir la valeur sur WordPress si vous protégez une origine WordPress ou WooCommerce. Cela exclura des vérifications de l'API CrowdHandler les requêtes d'URL correspondant au modèle d'expression régulière suivant :/(w[cp][-_](?![-_])(?!order_).*|xmlrpc\.php|readme\.html|license\.txt|trackback|feed(?:\/.*)?|comments\/feed(?:\/.*)?)(\?.*)?/
NO_BYPASS— LeNO_BYPASSCette valeur sera transmise à votre source en tant que valeur de l'en-tête « x-ch-no-bypass ». Vous pouvez rechercher cet en-tête dans votre application afin de vérifier que la requête est bien passée par CrowdHandler. Vous trouverez des exemples d'implémentation dans la section « Exemples d'intégration » de cet article.
FAIL_TRUST(par défaut vrai) — Par défaut, les utilisateurs qui ne parviennent pas à s'authentifier via l'API de CrowdHandler seront considérés comme fiables. Si l'option est définie sur false, les utilisateurs qui ne parviennent pas à s'enregistrer via l'API de CrowdHandler seront redirigés vers une salle d'attente de sécurité jusqu'à ce que CrowdHandler soit en mesure de décider de la suite à leur donner. En savoir plus sur « Trust on Fail » ici.
SAFETY_NET_SLUG— SiSAFETY_NET_SLUGest défini etFAIL_TRUSTest défini sur false, cette salle d'attente servira de salle de secours. Si vous ne définissez pas deSAFETY_NET_SLUGvaleur etFAIL_TRUSTest défini sur false, un modèle générique de salle d’attente servira de salle de secours. Vous trouverez l’identifiant de votre salle d’attente dans le panneau de configuration de CrowdHandler, dans le champ « URL » de la configuration de votre salle.
COOKIE_DOMAIN— Par défaut, le cookie CrowdHandler est limité à l'hôte. DéfinissezCOOKIE_DOMAINvers un domaine parent (par exemple, example.com) afin de le partager entre les sous-domaines — ce qui s'avère utile lors de la mise en file d'attente sur www.example.com et la validation des sessions sur api.example.com. Doit être un parent du nom d'hôte du worker ; les valeurs non valides sont ignorées.
IP_HEADER— Par défaut, le worker lit l'adresse IP du client à partir de l'en-tête « cf-connecting-ip » de Cloudflare. Si votre trafic arrive sur Cloudflare via un proxy en amont (par exemple, zScaler ou Imperva) qui insère l'adresse IP d'origine du client dans un autre en-tête, configurezIP_HEADERà ce nom d'en-tête (par exemple, x-forwarded-for) afin d'utiliser l'adresse IP qui y figure. Pour les en-têtes comportant plusieurs valeurs, c'est l'entrée la plus à gauche qui est utilisée. Si l'en-tête configuré est absent, vide ou si une erreur survient lors de son analyse, le worker revient en toute sécurité à la valeur « cf-connecting-ip » ; ainsi, les déploiements existants ne sont pas affectés lorsque cette variable n'est pas définie.Important : n'activez cette option que si vous êtes certain que votre trafic transite par un proxy en amont fiable que vous contrôlez.
Étape 3 : Configurer les routes protégées
-
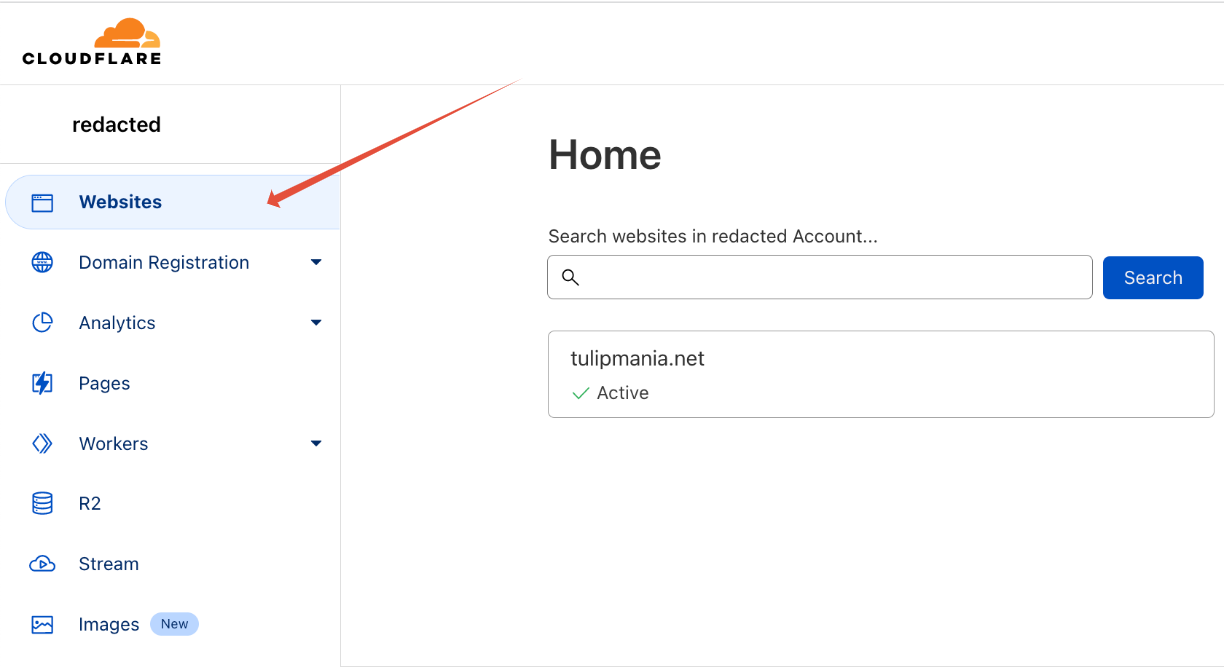
Dans le menu de navigation de gauche, cliquez sur « Sites Web », puis sur le domaine sur lequel vous intégrez CrowdHandler.
-
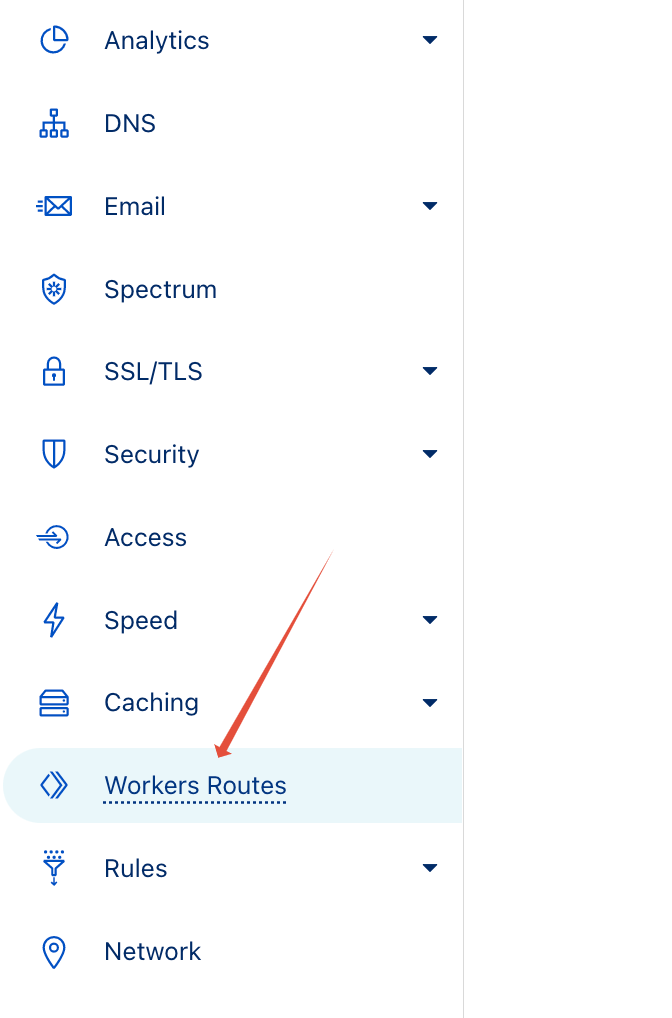
À l'aide du menu de navigation de gauche, sélectionnez à nouveau « Itinéraires des employés ».
-
Ajoutez la voie que vous souhaitez sécuriser.
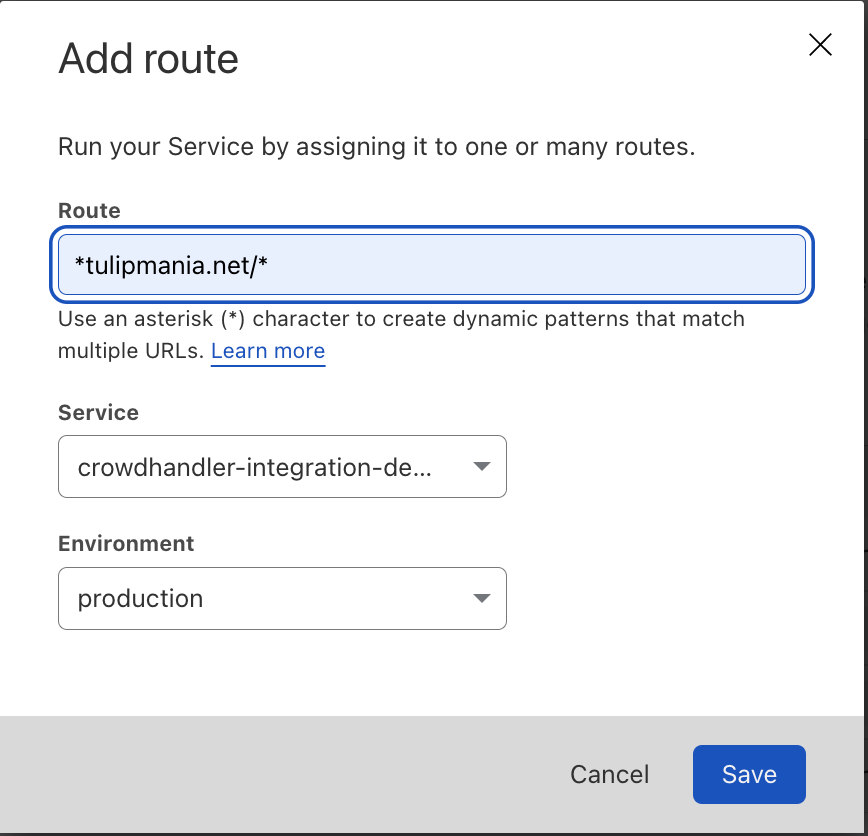
Le modèle ci-dessus déclenchera le worker CrowdHandler pour toutes les routes de votre site, à l'exception des routes exclues que vous configurerez à l'étape suivante.
IMPORTANT
Si vous choisissez de protéger un itinéraire plus précis, par exemple
*tulipmania.net/enroll-now, ET vous avez défini la variable facultativeWHITELABELSi c'est le cas, vous devriez ajouter un itinéraire supplémentaire couvrant*tulipmania.net/ch*. Sans cette règle, le Worker Cloudflare ne se déclenchera pas pour afficher la salle d'attente.
Étape 4 : Exclure des itinéraires
-
Excluez les routes qui ne doivent pas bénéficier de la protection CrowdHandler en ajoutant des routes supplémentaires, puis en sélectionnant « Aucune » dans le menu déroulant « worker ».
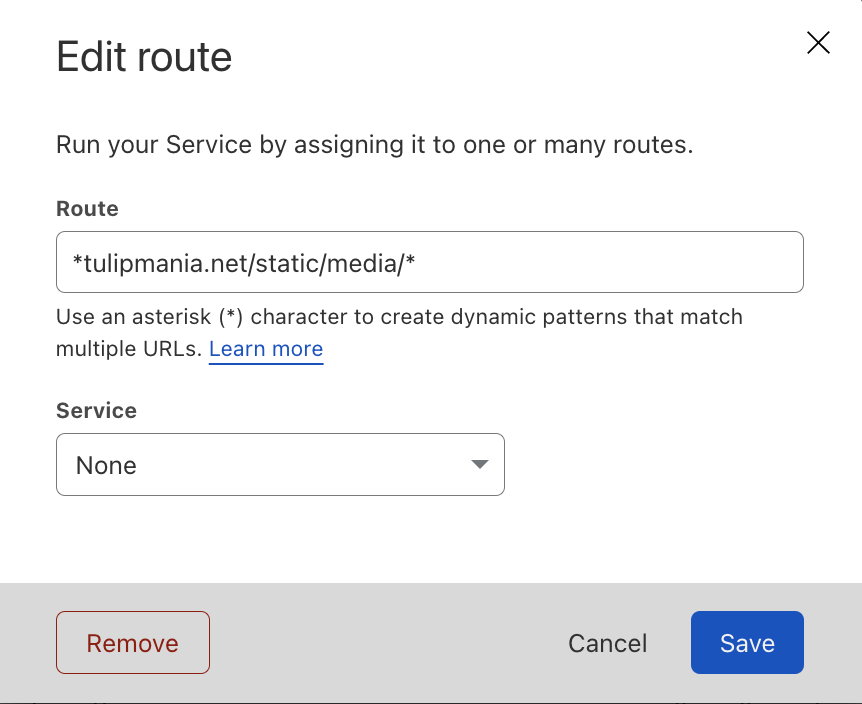
Par défaut, CrowdHandler ne tentera pas automatiquement de mettre en file d'attente les routes présentant les extensions de fichier suivantes :
avi, css, csv, eot, gif, ico, jpg, js, json, map, mov, mp4, mpeg, mpg, ogg, ogv, ott, pdf, png, svg, ttf, webmanifest, wmv, woff, woff2, xmlVoici quelques exemples d'itinéraires que vous pourriez envisager d'exclure :
- Chemins d'accès utilisés pour stocker les ressources statiques et les fichiers multimédias, par exemple /images/*
- URL de rappel générées par des prestataires de paiement tiers.
- Flux JSON et RSS.
Étape 5 : Finalisez votre configuration
CrowdHandler est intégré à votre compte Cloudflare. C'est désormais à vous de personnaliser la configuration de CrowdHandler via la console d'administration CrowdHandler. Voici quelques articles d'aide recommandés qui présentent les notions de base :
- Pour commencer (vous pouvez ignorer les parties concernant l'installation de l'intégration JavaScript.)
- Salles d'attente
- Configuration du domaine
Étape 6 (recommandée) : désactiver la limitation de débit de Cloudflare Workers
La formule gratuite de Cloudflare Workers est soumise à une limite quotidienne de 100 000 requêtes, qui se réinitialise à minuit (UTC). Si ce plafond s'avère insuffisant pour votre trafic, nous vous recommandons la formule payante de Workers, qui supprime cette limite quotidienne.
Étape 7 : Réalisation d'un test d'intégration simple
Une fois les étapes de configuration terminées, nous vous recommandons de procéder à un test de fonctionnement de votre installation, comme décrit dans le guide disponible ici : Comment tester la salle d'attente ?